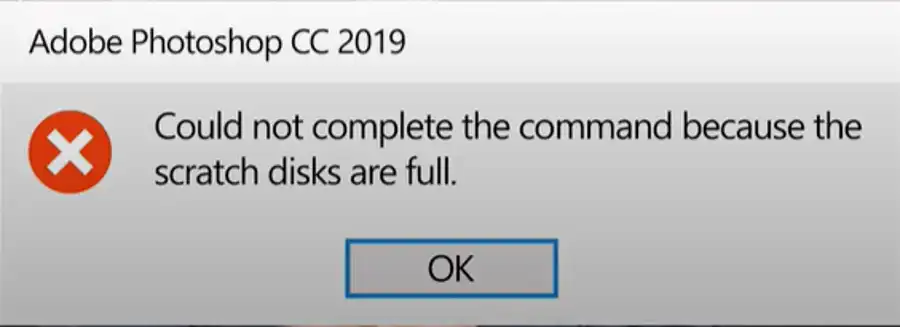
Are you encountering a problem while opening Adobe Photoshop that says, “Could not initialize Photoshop because the scratch disks are full?” Don’t worry; we’ve got you covered. This article will elaborate on the possible reasons behind this error and provide you with effective methods for resolving it.


What is the ‘scratch disks are full’ error?

Before diving into explanations, let us first define what a scratch disk is. When you open Adobe Photoshop, it uses a specific location to store its temporary files, which cannot fit inside the RAM memory. This location is called a scratch disk. By default, in Adobe Photoshop CS6 and newer versions, the scratch disk is set at the location where the operating system is installed.
While using the tool, when you run out of space in the scratch disk, Adobe Photoshop throws the ‘scratch disks are full’ error. In simpler terms, the error signifies that the hard drive on which the scratch disk is located has run out of storage space required to execute the task.

Reasons behind the scratch disks are full error:

Several reasons may lead to the ‘scratch disks are full’ error. Some of them include:
- Low space on the default scratch disk.
- Multiple scratch disks specified in Photoshop preferences yet unassigned.
- Abrupt shutdown of the PC, leading to the creation of temporary files.
- Noncontiguous or fragmented free space on a scratch disk.
Methods to fix the scratch disks are full error:
Here are some techniques that can help you fix the ‘scratch disks are full’ error:
Remove temporary files:
This is the most natural solution that you can try. You can manually delete the temporary files that are cluttering up your scratch disk location. Open the location where your scratch disk is specified and clear the temporary files from there.
Start Photoshop by holding Control + Alt keys:
If Adobe Photoshop 2019, or earlier, cannot launch because the scratch disk is full, hold down the Cmd + Option keys (macOS) or Ctrl + Alt keys (Windows) during launch to set a new scratch disk.

Create a separate disk partition:
Creating a separate disk partition can help eliminate the problem if your scratch disk has low space. You can partition the hard drive and assign space to the scratch disk according to your needs.
Optimize your hard drive:
Optimizing your hard drive can help resolve the ‘scratch disks are full’ error. Consider defragging or cleaning unnecessary files from the scratch disk location.
To change the scratch disk location:

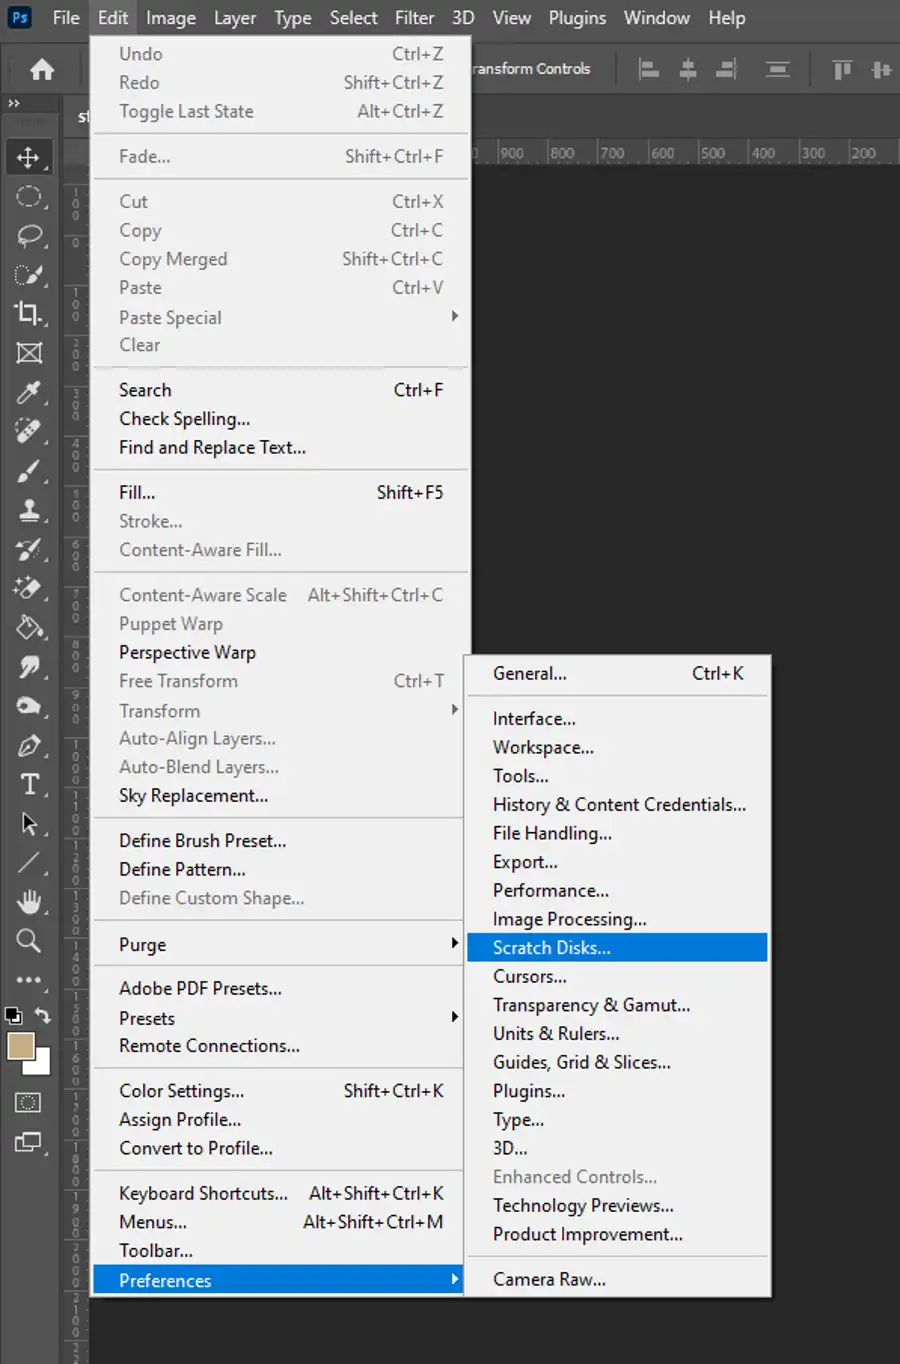
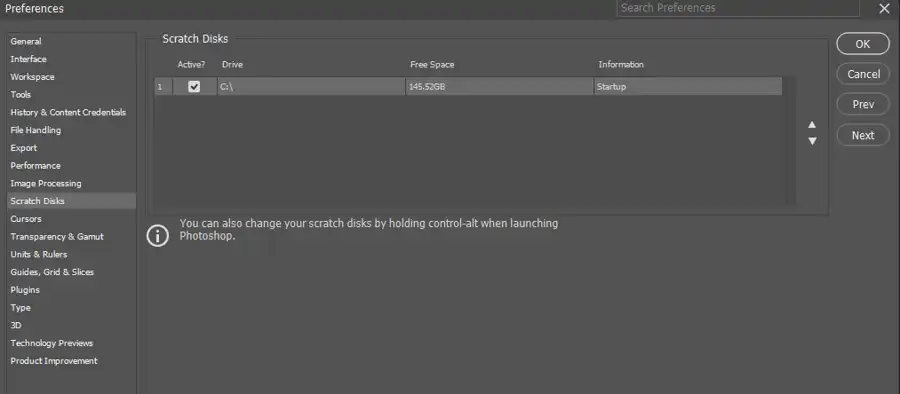
Follow the steps mentioned below to set up scratch disks in Photoshop:
- Open Adobe Photoshop and go to Preferences > Scratch Disks.
- Select or deselect the active checkbox to enable or disable a scratch disk.
- To change the scratch disk order, click on the arrow buttons.
- Click Ok.
- Restart Photoshop for applying the changes.
It is essential to keep in mind that the minimum free space requirement for a scratch disk should be 6 GB for Adobe Photoshop desktop. However, that is only the minimum limit that Photoshop tries to save as free space on the scratch disk. The actual available space that Photoshop considers in the scratch disk is the difference between the current free space in the disk and 6GB.

Additionally, having a minimum of 20 GB free space on your OS hard drive while working with Photoshop is recommended. Large changes to dense pixel layers, such as using several filters on complex background images, could increase the required size of the scratch disk.
Lastly, some drives or USBs are not suitable for scratch disk storage. Drives such as thumb drives, USB-2 drives, and NTFS formatted drives on macOS are not recommended. Consider connecting the scratch disk to a compatible port that has the highest bandwidth limit for optimum performance.
Questions you might be asking
How do I empty the scratch disk in Photoshop?
To empty the scratch disk in Photoshop, go to the Edit menu and select Preferences. Then, select Performance. In the Scratch Disk section, select the drive you want to clear and click on the "Clear" button. You can also choose to change the scratch disk location to a drive with more space.
How do I open Photoshop with full scratch disk?
If your scratch disk is full and you need to open Photoshop, you can try holding down the Ctrl + Alt keys (Windows) or Command + Option keys (Mac) while opening Photoshop. This will bring up the Scratch Disk Preferences dialog box, where you can select a new scratch disk or clear the current one.
How do I clear my scratch disk if Photoshop won't open?
If Photoshop won't open due to a full scratch disk, you can try deleting temporary files manually. Go to the Windows Explorer or Finder and navigate to the scratch disk location. Look for folders or files with names like "Photoshop Temp" or "Photoshop Scratch" and delete them. You can also try restarting your computer before attempting to open Photoshop again.
Could not initialize Photoshop because of a disk error?
If you receive an error message saying "Could not initialize Photoshop because of a disk error," it could be due to a damaged preference file or corrupted installation. You can try resetting your Photoshop preferences by holding down the Ctrl + Alt + Shift keys (Windows) or Command + Option + Shift keys (Mac) while opening Photoshop. If that doesn't work, you can try reinstalling Photoshop or running a disk check utility to repair any errors on your hard drive.


