In this tutorial, we'll learn how to add ambient occlusion into your models in Blender to achieve that perfect photo realistic look.
So, let's get started!

What is ambient occlusion?
Ambient occlusion (AO) adds realism and depth to 3D computer graphics. It simulates global illumination by darkening shadowed areas like corners and crevices. AO in Blender adds realistic shadows and depth to 3D objects and scenes.
Ambient occlusion creates soft shadows where light can't reach. Only direct rays from a light source can reach these areas because there are no diffuse reflections from nearby surfaces. Enable AO in render settings for it to work. Once enabled, it calculates how much ambient light each surface receives and creates shadows.
Blender lets you adjust ambient occlusion globally or per-object. This can give your renderings a subtle yet powerful look and increase their realism. You can also use lights or fog skies to enhance the atmosphere.
Ambient occlusion is a great way to add realism and depth to 3D renders in Blender without learning complex lighting setups. This simple trick is guaranteed to take your renders from average to amazing.
Does Blender have Ambient Occlusion?

The short answer is, yes. Blender does have ambient occlusion. You could use AO in Blender to simulate indirect light bouncing off objects to lend depth to 3D environments. It adds shadows to 3D objects' edges and corners to make them look more natural. Blender's Ambient Occlusion can be enabled under the "World" tab of the options panel. This effect's power, distance, color, and samples per pixel can be changed. You can render using ambient occlusion after setting your parameters.
Using ambient occlusion in Blender you can improve your 3D object's realism and believability without sophisticated lighting or post-processing. It's popular among those who desire convincing pictures with less work because it renders precise shadows at low cost. Ambient occlusion lets architecture visualizers deliver detailed environment views fast while maintaining realism. In addition, it helps product representations look more authentic by bringing out tiny features like wood grain or metal flaws.
How to add ambient occlusion in Blender?

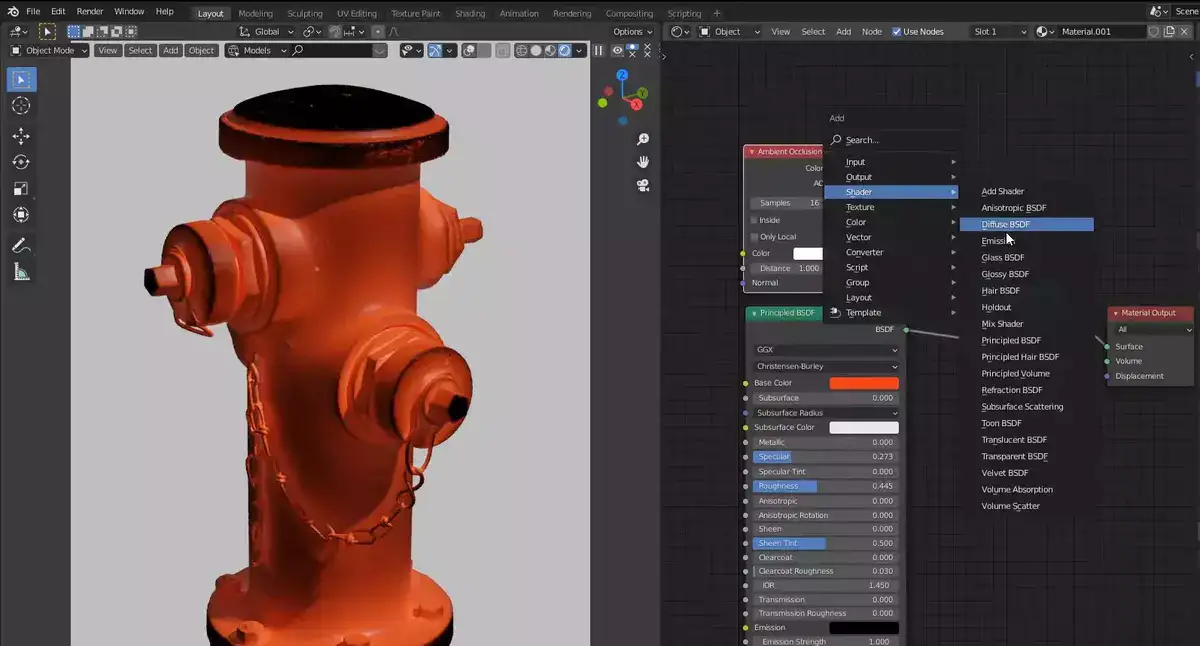
First, enable Blender's Ambient Occlusion node. Select your material from the list on the left, then click "Add" under "Texture Nodes" in the Node Editor box. New node with drop-down option containing Ambient Occlusion. Enter it.
Set Ambient Occlusion strength, distance, samples, and falloff type. Double-clicking your new AI node opens its options window. Too much AO can make items look dark or blocky, so experiment to determine what looks best for each project.
Once your settings are good, link an AI node output to a shader input (e.g., Diffuse Color). Blender uses ambient occlusion while rendering final images, giving them more depth and realism than without it.
Ambient occlusion in Blender can add realism and depth to 3D models and scenes with no effort, saving time while offering outstanding aesthetic effects. Don't wait: use this amazing tool to bring your projects to life.
Blender Ambient occlusion node not working
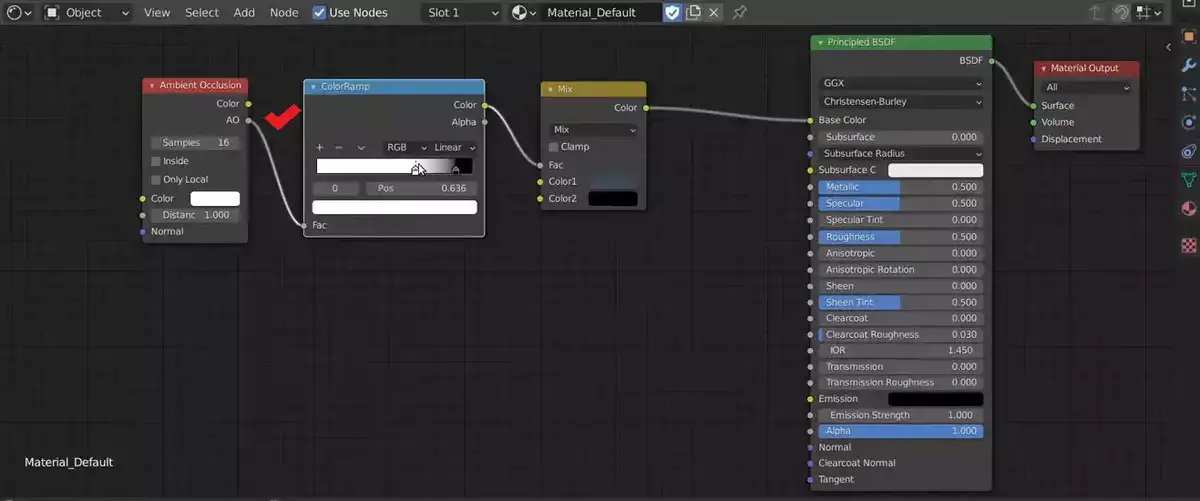
First, double-check your settings and nodes. Also, assign an ambient occlusion map or texture to each material. Under "Influence," check "AO" so it's activated.
If these fixes don't work, create a new shader for the object you're working on. If this doesn't work, double check your lighting configuration, as this can potentially create AO rendering issues. If none of these ideas work, reboot Blender and set up the scene from scratch.
By following each step in order, you should discover out what caused the Ambient Occlusion node to stop operating and fix it. Stay focused and keep trying until you find a solution.
