No movie or video project would be complete without some kind of music or special sound effects in the background. In this tutorial, we'll learn how to add music to your Premiere Pro projects. Let's get started.
Key Takeaways
- Premiere Pro allows audio clips to be added inside your projects
- You can edit your music and sounds inside Premiere Pro.

Also read: How to fade music in Premiere Pro
How do you add music in Premiere Pro?
Step 1: Create a project and add a clip to your timeline.

Step 2: Take a close look at your timeline and you'll see it's divided into two sections. The top part is dedicated to video clips and the bottom part is for audio clips.

Step 3: Drag and drop your music clip into the audio section of your timeline.
Step 4: Press on shortcut "C" to activate the razor tool to cut away extra music so that it ends at the same time as your video clip.

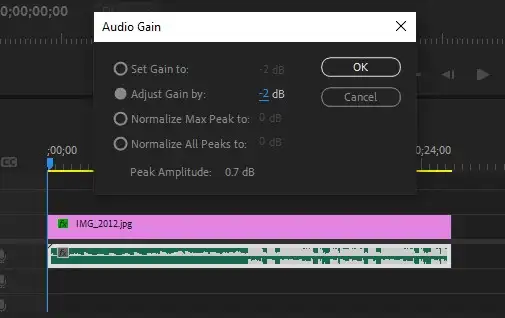
Step 5: Right-click on your audio clip and select "Audio Gain" to turn down its volume a little. We usually set the gain to between -25 and -35 so it doesn't overwhelm the viewer.
Also read: Fix out of sync audio
Can you add music from Spotify to Premiere Pro?
The short answer is you can't. There isn't a direct link between Premiere Pro and Spotify. Even if there was a way, it wouldn't be possible due to copyright reasons. You can, however, use copyright-free music from YouTube Audio Library, download and include them in your projects.
If you're certain you won't get into copyright troubles by using music you found on Spotify, you could find the same song on YouTube, download the MP3, and include that in your Premiere Pro project.
Some songs can be used that way on YouTube even if they're not available in its royalty-free Audio Library.
Also read: Separate audio from video in Premiere Pro
Conclusion
Adding your own music or sound effects to Premiere Pro takes only a few seconds using the method we outlined above. If you're having a problem or there's other things you'd like to know, feel free to reach us out.
