There are countless effects you can achieve and illustrations you can make using circles, arrows, rectangles, and other shapes in your projects. In this tutorial, we'll cover how to add shapes in Premiere Pro using different methods.

Also read: How to trim a video in Premiere Pro?
How do I import a shape into Premiere Pro?
Sometimes you'll need more complex shapes and graphs than basic circles and rectangles. If that's the case, you can always import your custom shapes into Premiere Pro.
The only way to do that is to draw your shape in Adobe Illustrator and then export the shape in AI extension. You can simply drag and drop the shape into your Premiere Pro project. Adobe lets you work between other Creative Cloud applications seamlessly, and the shape will work just fine. You can even double-click to edit it, which will import the graph back into Illustrator. Once you're done editing your custom shape, you could simply save the project, and the graph will be exported automatically to your Premiere Pro project.
Related: How to add a title in Premiere Pro?
You may also import the shape to Premiere Pro as a regular PNG image. Just make sure it has a transparent background.
How do I draw a shape in Premiere?

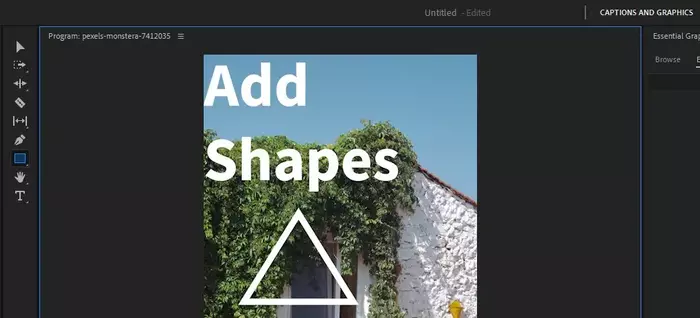
Step 1: Head over to the Captions and Graphics panel.

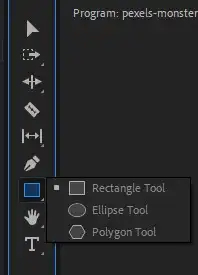
Step 2: Click and hold on to the rectangle tool to add a rectangular shape.
Step 3: Also try Ellipse and Polygon shapes.

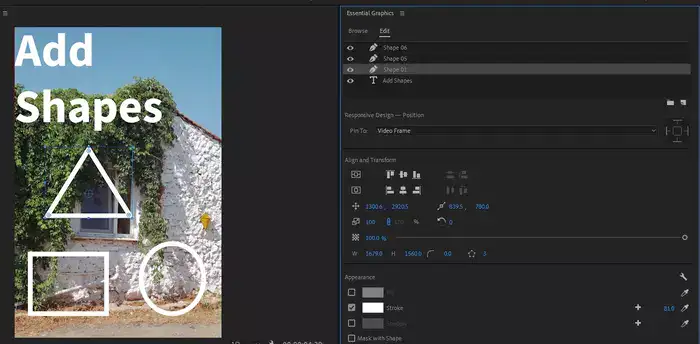
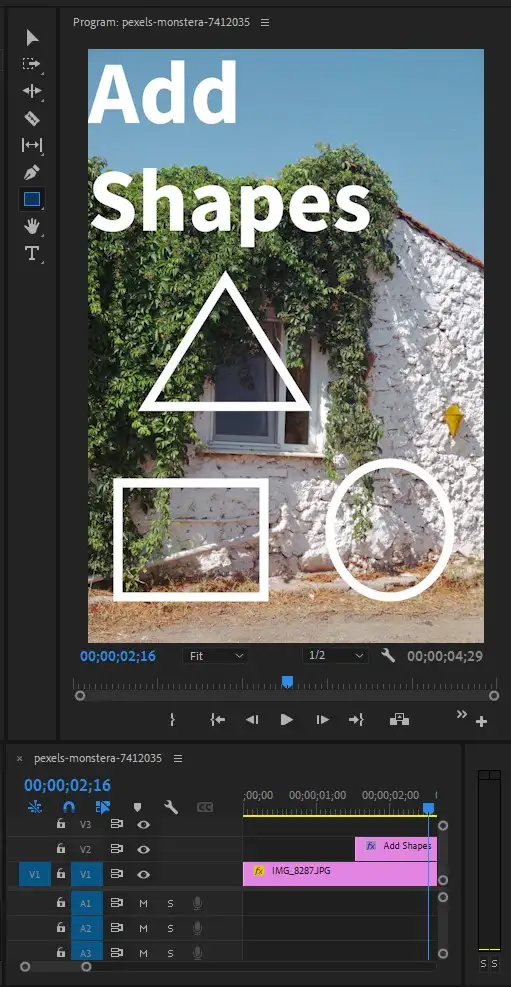
Step 4: Once you've applied your selected shape. You'll see a new graphic layer added to your timeline. Click on it and go to the Essential Graphics panel. Here you can manipulate the appearance of your shape's size and color in any way you like.
Fill Setting: This lets you select a color and fill the body of the shape.
Stroke Setting: That's basically where you set the border width and color of your shape. If you turn off Fill and increase stroke width, you'll get a shape with just the borders and transparent interior.
Shadow Setting: That one is self-explanatory. Using this setting, you can give your shape shadow. Also, change its shadow's opacity, angle, distance, size, and blur. You can achieve some neat effects using these.
Also read: Add lower thirds in Premiere Pro?
Why is the rectangle tool not showing in Premiere Pro?
There are a few things you can try to access the rectangle tool in Premiere Pro.
- Premiere Pro stacks up different shapes in its toolbar to save precious screen space. You may be seeing Ellipse shape for example, but the next shape in the stack could be the rectangle tool. To access it, simply click and hold on the shape, and the Premiere Pro will show you a list of available shapes you can use.
- If you don't see shapes at all, make sure you are currently viewing the Captions and Graphics panel to activate the shapes toolbar.
- You may be using an older version of Premiere Pro. Go to Help > Updates to make sure your software is up to date.
This is it for this tutorial. If you have any questions, feel free to reach out.

