Premiere Pro comes with more than 50+ professional transition effects you can use between your clips. Add to those the ones that are made by others and available to download online, you virtually have an unlimited amount of transitions to enrich your video production. In this tutorial, we're going to learn how you can add transitions in Premiere Pro. Whether you have a few videos or hundreds of clips, we'll dive into easy ways to accomplish the task.


PS: We have made a list of the best video editor for transitions. Be sure to check that out if you mainly deal with transition effects in your editing.
1. Create a subsequence and import videos

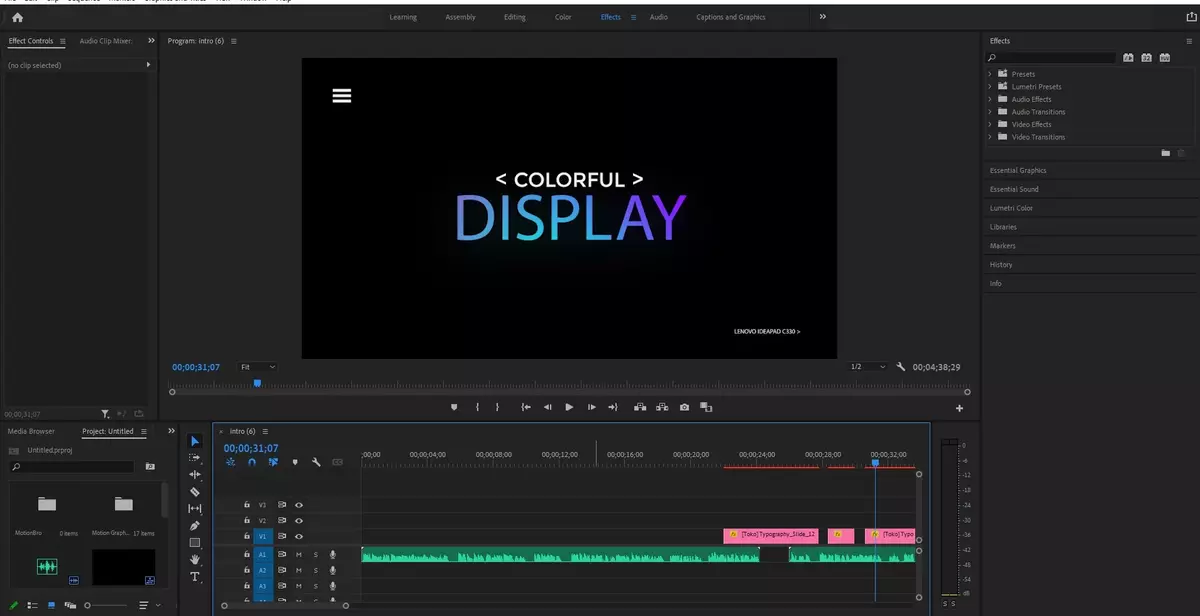
You can't add transition if you only have a single video clip on your timeline. Import 2 or more clips. Alternatively, you can cut a clip you have or use Premiere Pro's scene detection function to let it automatically decide where your clip needs to be cut.
2. Find a transition

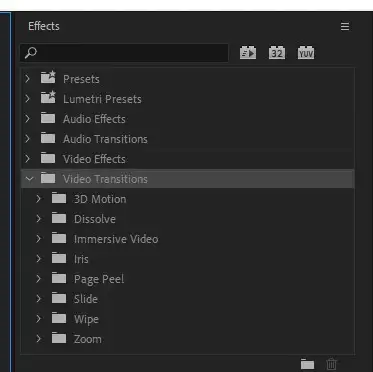
All the transitions in Premiere Pro can be found in the Effects panel under the video transitions section. Of course, these come pre-installed with the software. If you have downloaded custom transitions online or installed them as an extension, you'll need to locate them following the creator's tutorial.
3. Apply transition effect

If you have found the transition that looks good or you want to try them out, drag and drop them between two clips and it'll automatically be applied. Don't forget to set one of them as your default transition effect by right-clicking and set it as default. It'll be a lifesaver when we want to add the same effect using shortcuts and apply it to all clips.
That's it! It takes only a few seconds and less than 3 steps to add any transition you want to your videos. Now let's get to Q&A and answer some of your most asked questions.

Why can't I add video transitions in Premiere Pro?
There are various reasons you may not be able to add transitions. The first reason is you have only one image or video clip. As you can tell from the name, it needs to transition into something. Another reason is you are adding it to the audio. Video transitions will work only on video clips but some people accidentally drop them on the audio clips. Lastly, the length of the transition is longer than the video clip itself. This may also cause a problem, to fix it, simply click on the effect and shorten its length, or increase the video clip's length.
How do you add transitions to photos in Premiere Pro?
The same way you add a transition to video, simply drag and drop them on your photos. Just make sure the length of the photo on your timeline is longer than a few seconds to add your transition without any problems.
How do I add transitions to all clips in Premiere?
The first step to applying a transition to all the clips in a timeline is to select all the clips you have there. You could either use Shift to select them one by one or drag the mouse around them while left-clicking. Once you have them highlighted, click on CTRL + D to apply your default transition selection.

What is the best transition in Premiere?
The answer to that is subjective. All the stock transition effects your Adobe Premiere Pro has are professionally made and they suit different types of videos to achieve different outcomes. The best way to find the one that suits your videos best would be to check them out one by one.
What is whip pan transitions?
Whip pan transition is normally a cinematography technique achieved by moving the camera on X-axis fastly to generate blur on the footage. However, Premiere Pro lets you create the same outcome artificially using the Whip Pan transition effect. You can find it in Effects > Video Transitions > Slide > Whip
That's all for this tutorial everyone. I hope we've been able to help you add transitions on your Premiere Pro projects. Until next time!
