Depending on the project you’re creating, the types of footage you’re working with, you might have to change your frame size every now and then to present your footage to your audience in the best way possible. For example, the frame size of a video you’re creating for Instagram will have to be different from a video you render for YouTube. If you try to upload a video made for YouTube to Instagram stories, it’ll be cropped a lot.

Download the latest version of the Adobe Premiere Pro
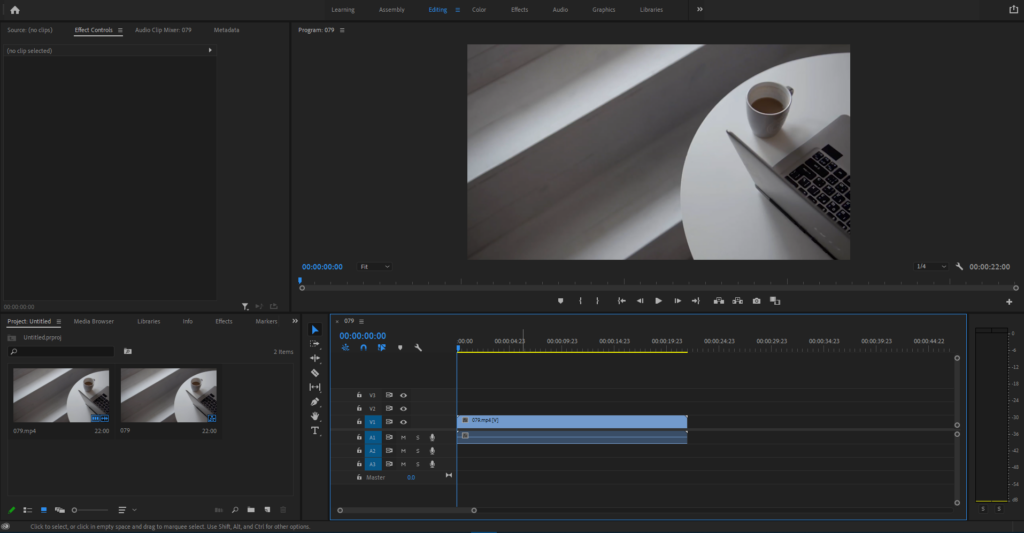
Before we move on to the tutorial, make sure you have your footage imported.

So, let’s get started with it how you can change your aspect ratio in Premiere Pro:
Find frame size in Premiere Pro
Before we try to change the frame size let’s first find out what it is.
Go to Sequence at the top and from the drop down menu, click on “Sequence settings”

A pop up window will appear showing you your aspect ratio and other sequence settings.

How do you change frame size in Premiere Pro?
The sequence settings panel we opened to find out about our aspect ratio will also let you change it. If you’re creating a video for Instagram stories, the right size would be 1080px by 1920px. Set the frame size according to your needs and hit OK.
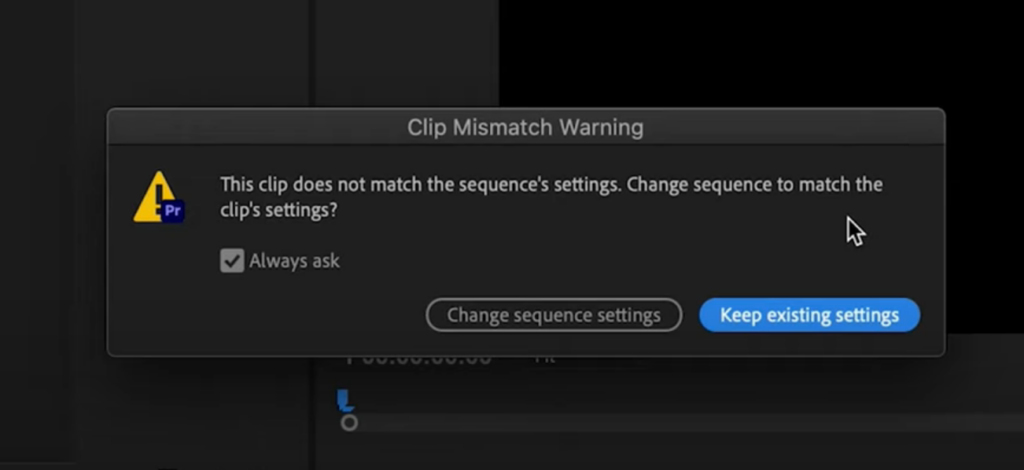
If you’re adding video to a new timeline, and the resolution of your footage doesn’t match your sequence, Premiere Pro will prompt a pop-up window, suggesting you change your sequence settings to match the footage. If you click on “Change sequence settings”, Premiere Pro will automatically change the sequence frame size.
Also read: How to fix blurry footage in Premiere Pro?

How to upscale 1080P to 4K in Premiere Pro?
If you need to use 1080P footage in a 4k full HD timeline, right click on your footage in your timeline and select “Scale to Frame Size” option. It’ll automatically scale up your 1080p footage to fill your 4K frame size.

What’s the best Premiere Pro frame size for YouTube?
Best YouTube frame size depends on your video quality (width & height). If you have a 1080p footage, the correct resolution and frame size would be 1920 x 1980. For 2K footage this is 2560 x 1440. And finally, for 4k ultra HD videos the frame size needs to be set at 3840 x 2160.
Here it’s also important to make sure that your “Pixel Aspect Ratio” is set to Square Pixels (1.0) if you want to achieve that standard 16:9 aspect ratio.
I can’t change frame size in Premiere Pro
You’ve tried all the steps outlined above, yet still can’t change your frame size? Here are a few possible reasons and their solutions
Frame size settings are grayed out

If you can’t change the frame size as shown in the image above, it’s because for some reason your Editing Mode is set to an incorrect value. Simply change it to custom and Premiere Pro should let you set whatever Frame Size you’d like to work with.

How do I change the frame size to 16:9 in Premiere?
16:9 aspect ratio is basically 1920 × 1080 dimensions.
Open up your project in Premiere and go to File > New > Sequence. This will open up a new sequence settings window. Under the "Basic Video Settings" heading, change the "Frame Size" to 1920x1080. This is the standard frame size for HD video.
Once you've changed the resolution, click "OK" and your sequence will be created. Now all you need to do is drag your video footage into the timeline with a new 16:9 aspect ratio and it will automatically be resized to fit the new frame size.
Is 1920x1080 equal to 16:9?
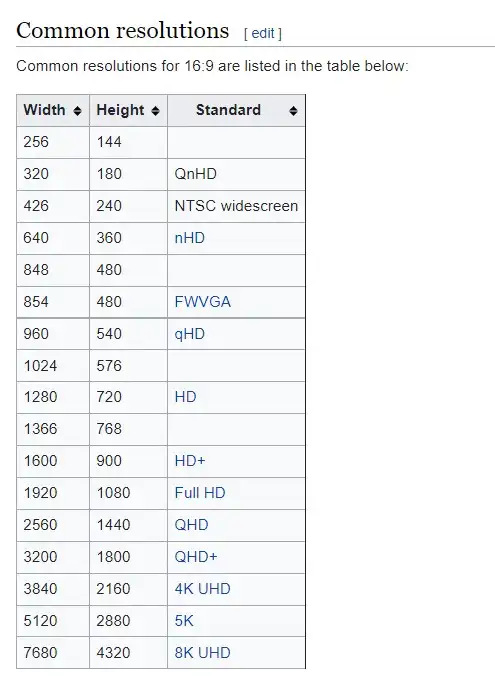
Yes, 1920x1080p resolution is equal to 16:9. However, it's not the only one. There are other resolutions you can use to achieve 16:9 ratio such as 1600x900 or 7680x4320p which would be 8K UHD. Here's the full list of 16:9 ratio and their resolution equals:

This is all for this tutorial everyone. Did this guide help you manipulate the aspect ratio and frame size of your project? Are there any other methods we haven’t mentioned? Please let us know in the comments below and share your insight with the others.
Good luck.

