
When it comes to photo manipulation and editing, Adobe Photoshop is the gold standard in the field. With its diverse range of tools and features, Photoshop has become the go-to software for graphic designers, artists, photographers, and editors alike. One of the fundamental skills in Photoshop is mastering perspective transform, which requires a good understanding of how to manipulate images to achieve realistic and convincing results.

Photoshop's Perspective Warp feature addresses the issue of distorted images that are the result of the photographer's angle in relation to the building in the image.
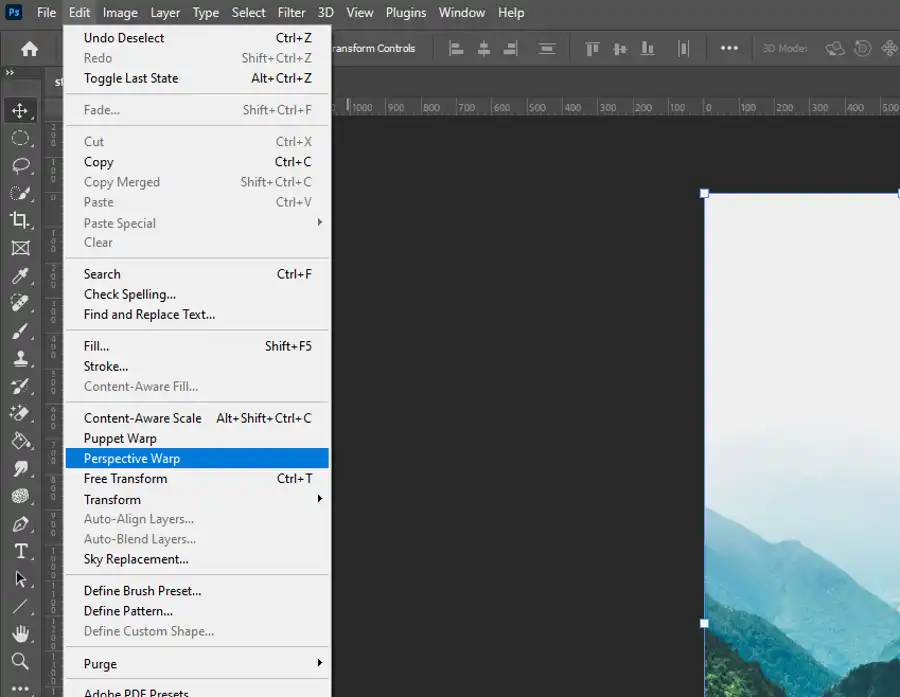
- To use the Perspective Warp tool, select edit > perspective warp.
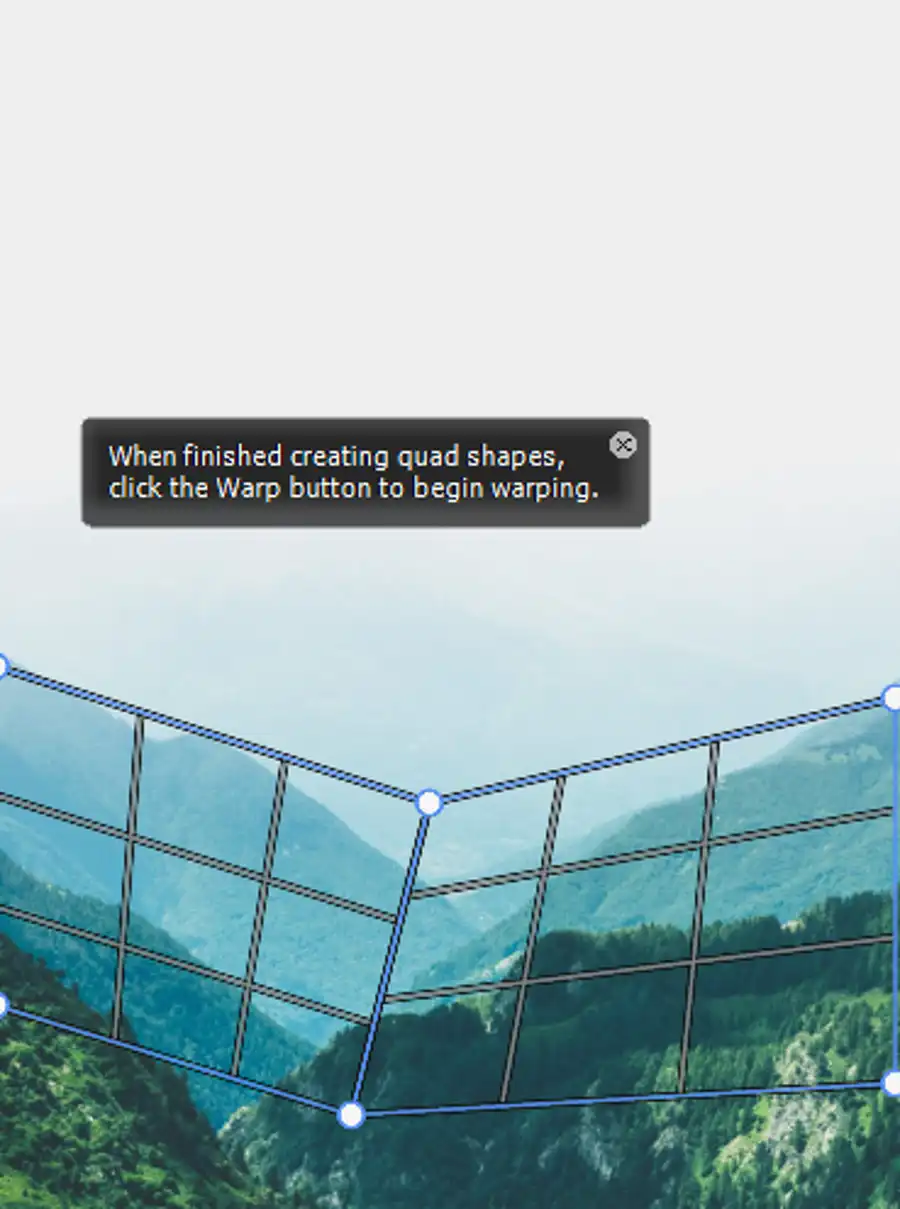
- Click anywhere on the image to create the first perspective grid plane, then click and drag at each of the corners to align them with the apparent corners of one face of the building.
- Create a second perspective grid plane by clicking once again on the image. Connect the two planes by clicking on a corner of the second grid plane that will connect to the first.
- Drag each of the remaining grid plane corners to align with the apparent corners on the adjoining face of the building, then click the Warp button in the Options Bar.
- Finally, click and drag on the top outer corners of each grid plane until the vertical lines in the image appear to be truly vertical, and press the Commit button in the Options Bar.
While the tool can significantly transform the perspective and appearance of a building, certain parts of the image may need to be adjusted manually. However, when used correctly, this tool can be a real game-changer for architectural photography.
Vanishing point
Another technique for placing objects in perspective is by using the "Vanishing Point" filter. This filter creates a grid plane that snaps to the perspective in an image, allowing you to paste an object onto the grid plane and move it in the correct perspective.
You can access this tool by selecting Filters > Vanishing Point in Photoshop.
Questions you might be asking
Why can't I change perspective in Photoshop?
If you are unable to change the perspective in Photoshop, it could be because you are working with a background layer. Photoshop does not allow you to transform the perspective of a background layer. To resolve this, simply double click on the background layer and convert it to a regular layer. You can then transform the perspective as needed.
How do you skew perspective in Photoshop?
To skew the perspective in Photoshop, select the layer you want to transform and click on Edit > Transform > Perspective. You will see a bounding box with handles that you can use to stretch or compress the image at different angles. You can also adjust the angle of the perspective by dragging the top handles left or right.
How do I change the angle of an image in Photoshop?
To change the angle of an image in Photoshop, select the layer you want to transform and click on Edit > Transform > Rotate. This will give you a bounding box with handles that you can use to rotate the image clockwise or counterclockwise. You can also enter a specific angle value in the options bar at the top of the screen. Once you have rotated the image to your desired angle, hit the Enter key to apply the transformation.