
Welcome to this Photoshop tutorial where we’ll show you how to change the color of a shirt or any garment in just three simple steps. With Adobe Photoshop, the possibilities are endless and changing the color of a shirt in an image is no exception. Whether you want to give a classic black shirt a vibrant pop of color or change the entire look of an outfit, we’ve got you covered on the steps needed to do just that.

Before getting started, it’s important to note that duplicating the original image before editing is a crucial step in preserving the original photo in case a mistake is made along the way.
Here are the steps you need to follow in order to change the color of a shirt in Photoshop:

What You'll Need
- A working version of Adobe Photoshop
Step 1: Reason for Changing the Color
The reason for changing the color of a shirt can vary. From wanting to create a unique look for fashion photoshoots to simply wanting to see what a certain color might look like on a shirt, Photoshop can provide a way to visualize these differences.
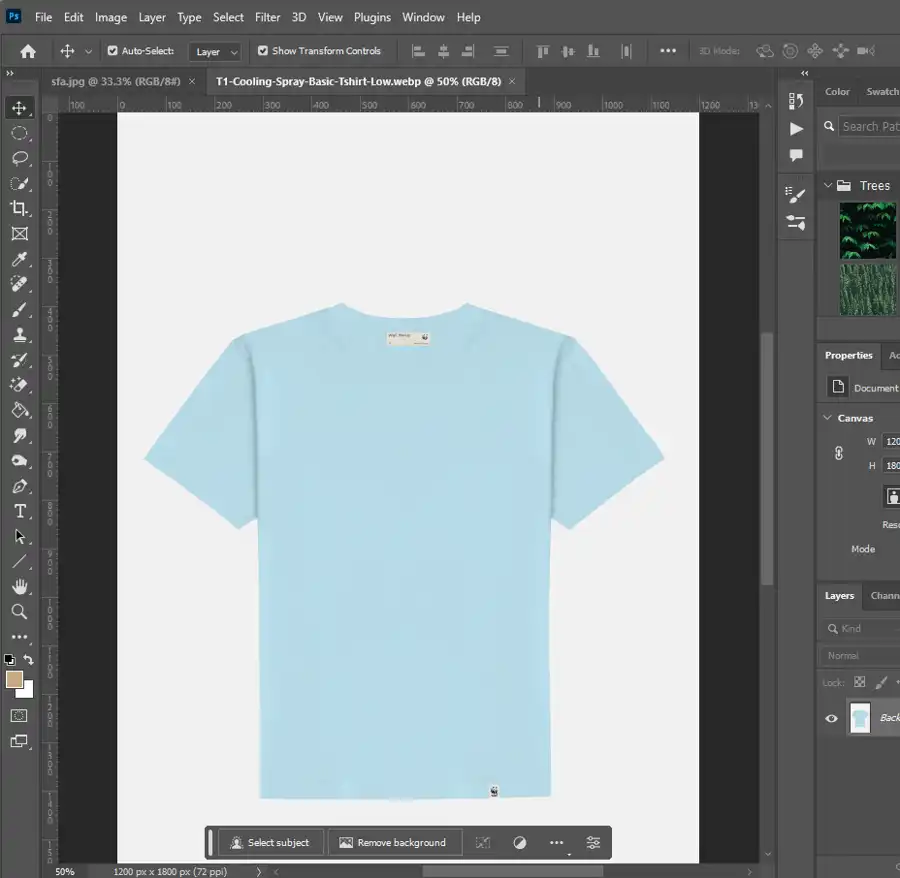
Step 2: Creating a Mask
The first step in changing a shirt color is to create a mask of the clothing item to be changed. This mask will allow for a seamless and accurate color change. There are two methods to create a mask, depending on the uniqueness of the color:
Standard Method of Creating a Mask
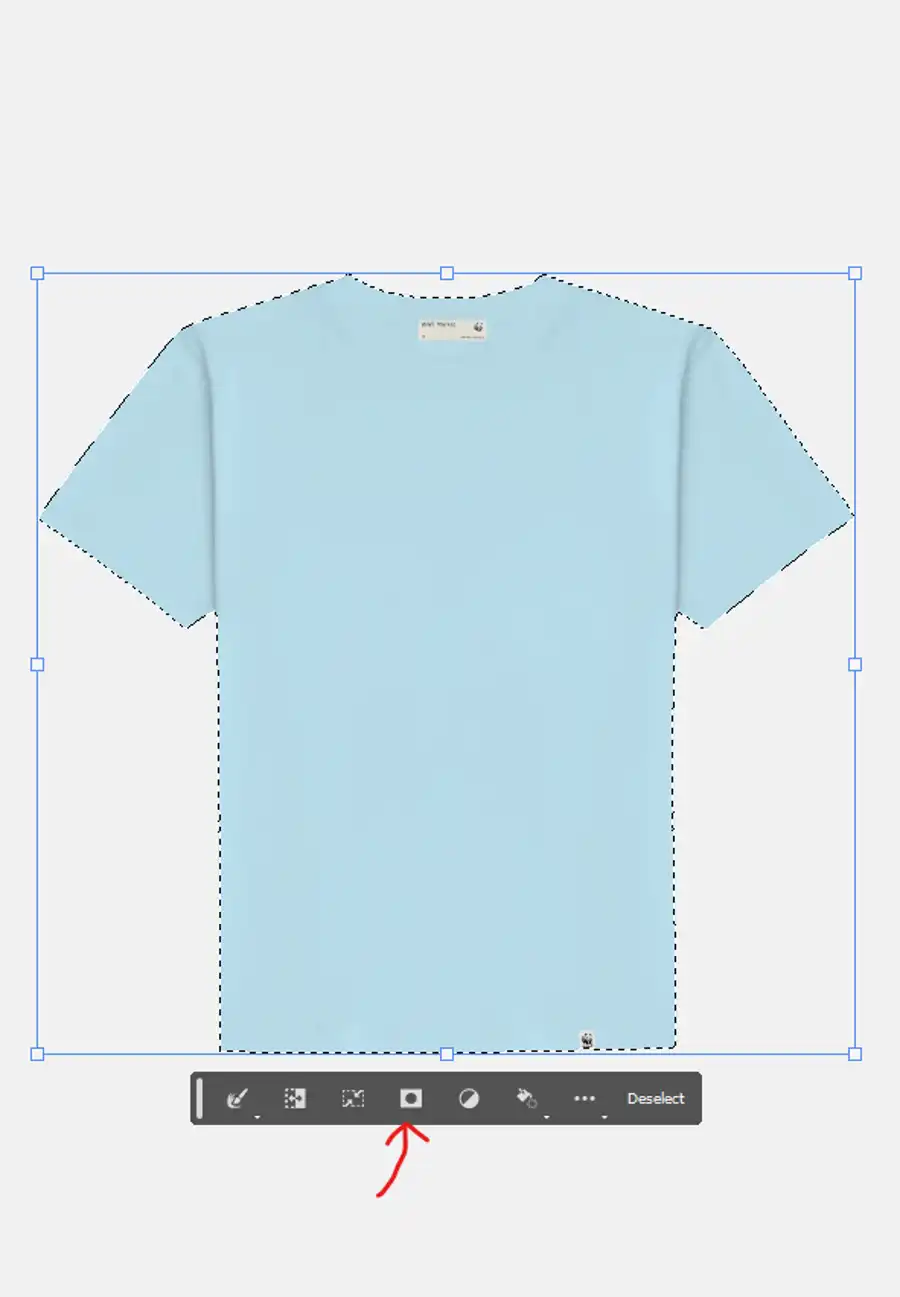
The standard method of creating a mask requires opening the photo with the shirt that needs to be changed and selecting the "Quick Selection Tool" from the toolbar. Make sure that the tool is set to "add to selection" and then select the shirt by clicking and dragging the tool over the area.
Once the shirt is selected, hold down the "Alt" key and drag the tool over any areas that shouldn't be included in the selection, such as the background or skin tone. Once the selection is complete, right-click and choose "Layer Via Copy" to create a new layer with the shirt on it.

Alternative Method for Unique Colors
If the shirt color is too unique or has shadows that make the standard method difficult, use the "Color Range" selector. While the original image is still open, click on "Select" from the top menu and choose "Color Range". Click on the area of the shirt you’d like to change the color for and adjust the sliders to include as much or as little of the color as desired. Once the selection is complete, create a mask with the selected area, then right-click and choose "Layer Via Copy".
Step 3: Using the Hue/Saturation Window to Change Color
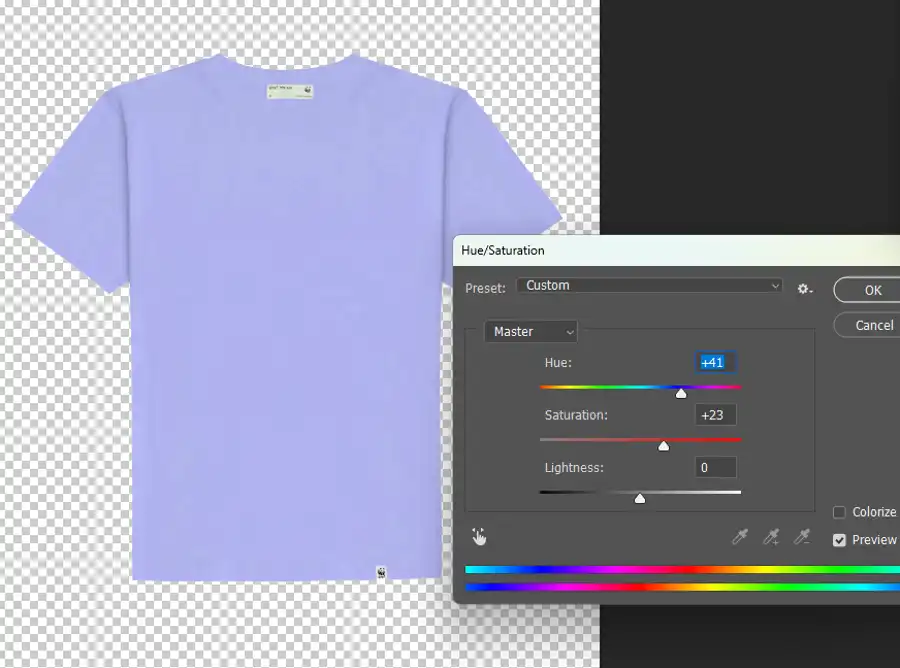
With a duplicate layer of the shirt created, select it and look for the "Hue/Saturation" window in the "Adjustments" section of the "Layers" palette. Clicking on the "Colorize" box will bring up options to adjust the hue, saturation, and lightness. To change the color of the shirt, use the hue slider to pick a new color.
Step 4: Previewing the Finished Image
Once the color is adjusted, preview the finished image by toggling the visibility of the original layer on and off. This will allow you to see how the color change looks.
Step 5: Duplicating the Edited Shirt Layer for Multiple Colors
If multiple color options are needed, duplicate the edited shirt layer and repeat the steps listed to change the color. Continue the process until all desired color variations are created.
Step 6: Note on Using the Color Replacement Tool
While there is a color replacement tool available in the toolbar, it is not recommended for changing a shirt's color. The tool is not as precise and can lead to inaccurate edits.
Step 7: Option of Drawing a New Shirt in Adobe Illustrator
For more precise control over shirt designs, the option to draw a new shirt in Adobe Illustrator then inserting it into the Photoshop document is available. This allows for complete control over the shirt’s color and design.
Good Job!
Congratulations! You’ve successfully changed the color of a shirt in Photoshop.
Recommended Photoshop Tutorials
Looking to learn more about Photoshop and its capabilities? Check out our recommended tutorials on the website today.
In summary, there are a few methods to change the color of a shirt on Photoshop. From creating a mask of the clothing item with either a standard or alternative method to using the hue/saturation window to preview and make changes. For multiple color options, duplicate the edited shirt layer and repeat the steps with a new color. Lastly, remember to duplicate the original image to preserve the original photo in case a mistake is made. Happy editing!

Questions you might be asking
How do I change the color of my shirt in Photoshop?
Changing the color of your shirt in Photoshop is an easy process. First, select the layer of the shirt that you want to change. Then, go to "Image" -> "Adjustments" -> "Hue/Saturation" and adjust the Hue slider until you get the desired color.
How do you make a shirt a different color in a picture?
To make a shirt a different color in a picture, you will need to use Photoshop's selection tools to isolate the shirt and then use the Hue/Saturation adjustment to change its color. You can also use other adjustment layers like Color Balance or Selective Color to achieve the desired color.
Can you change a shirt in Photoshop?
Yes, you can change a shirt in Photoshop using a variety of tools and techniques. You can use the Clone Stamp tool, the Healing Brush tool, or the Patch tool to replace details on the shirt. You can also use adjustment layers to change the color or brightness of the shirt.
How to change color of shirt in Photoshop from black to white?
To change the color of a black shirt to white in Photoshop, you need to follow these steps: First, create a new layer above your shirt layer and fill it with white color. Next, change the blending mode of the new layer to "Color." Finally, adjust the opacity of the layer to achieve the desired color.