When it comes to graphic design, Photoshop has long been a staple tool for designers and illustrators. One of the many features that make it such a powerful tool is its Shape tools. The Shape tools are versatile and allow users to create complex shapes with ease. However, even if you're experienced with Photoshop, editing shapes can seem like a daunting task. This guide will walk you through the process of editing shapes in Photoshop, covering a range of topics from adding new points to a shape, to adjusting the fill color and stroke.


Adding and Deleting Points to Existing Shapes

The Pen tool is your go-to tool when working with shapes in Photoshop. With the Pen tool selected, you can edit the points on a shape by clicking on the point and dragging it to a new location. Adding new points to a shape is also possible with the Pen tool. To add a new point, simply click and drag the Pen tool along the shape's edge, and a new point will be added to the shape. To delete a point, you can select the Pen tool and click on the point you want to delete. Alternatively, you can press the delete key on your keyboard. By adding and deleting points, you can shape your shape to your liking.

Changing the Fill Color and Stroke of Shapes

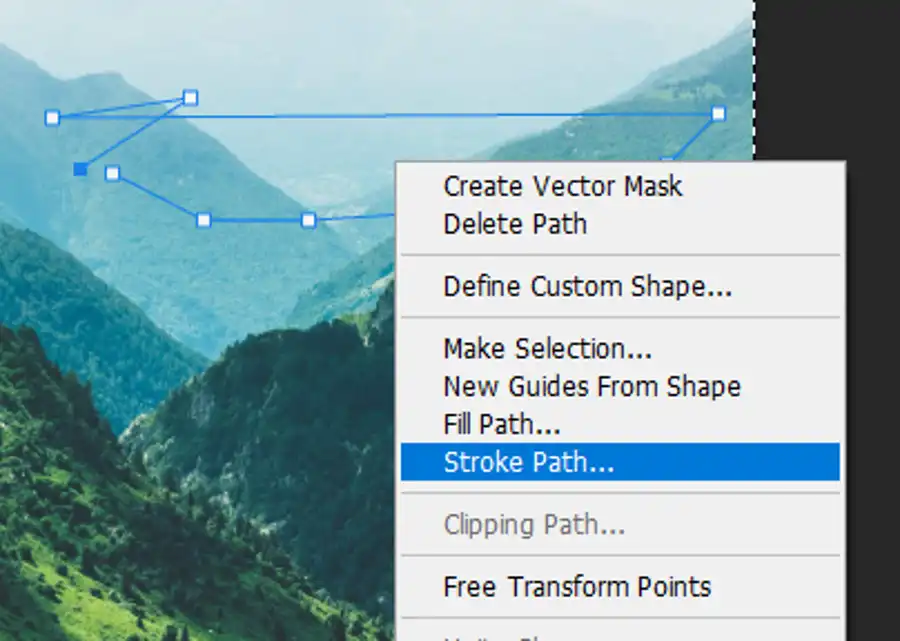
The fill color and stroke are key elements of shapes in Photoshop. To change the color or add a stroke, you need to select the layer and right-click on it. Then select "Blending options" and choose the desired color or customize the stroke settings. In the Blending Options window, you can customize the fill color using the Color Overlay settings. Here, you can use the Color Picker window to choose a color from a range of swatches or create a custom color.

Working with Shape Layers
In Adobe Photoshop, shapes can be added as individual layers. To create a new shape layer, you can use the Rectangle, Ellipse, Polygon, Line, or Custom Shape tool. Once you've selected your shape tool and created your shape, it will appear as a new layer in the Layers panel. You can then use the Direct Selection tool to adjust the points on your shape. The Layer Styles panel is another tool to modify the shape's properties. Here, you can add effects to your shape, such as a drop shadow or a bevel and emboss effect.
Using the Pen Tool to Create Complex Shapes
The Pen tool is arguably the most powerful tool for creating and editing shapes in Photoshop. It's excellent for creating custom or complex shapes that aren't available with the Shape tools. When using the Pen tool, you can create shapes by clicking on the canvas to create points and connecting them with lines. The Direct Selection tool can then be used to edit the points and shape by dragging them to new locations.

Questions you might be asking
How do I edit a shape with the pen tool in Photoshop?
To edit a shape with the pen tool in Photoshop, select the path selection tool (A) or the direct selection tool (V) from the toolbar. With the path selection tool, you can select an entire shape or path. With the direct selection tool, you can select individual points on the path to adjust their position or curve.
How do I draw and edit shapes in Photoshop?
To draw a shape in Photoshop, select the shape tool from the toolbar. Click and drag to create the size and shape you want. Once you have a shape created, you can use the path selection tool or the direct selection tool to edit it. You can adjust the position, size, shape, and stroke properties of the shape in the options bar at the top of the screen.
How do I change the shape of a custom shape tool in Photoshop?
To change the shape of a custom shape tool in Photoshop, select the custom shape tool from the toolbar. Click on the small arrow in the upper right corner of the Shape Picker panel. Choose a new shape from the list or click "Load Shapes" to select a different category of shapes. Once you have selected a new shape, you can use the options bar to adjust its size, rotation, and other properties.
How do I change the stroke of a shape in Photoshop?
To change the stroke of a shape in Photoshop, select the shape layer in the layers panel. In the options bar, you can choose from several stroke options, including size, color, and style. You can also adjust the stroke properties by opening the layer styles dialog box and selecting "Stroke". In this dialog box, you can adjust the stroke size, opacity, position, and other options.

