Inverting colors appears strange and unusual, but it's a technique that can transform an image entirely. The color inversion technique has been around for a long time and had its origins in analogue photography. Before the age of digital photography, photographers used to flip their black and white films' negatives to turn them into positive images, often with stunning results. Today, color inversion is used in the digital world to create unusual and creative art.


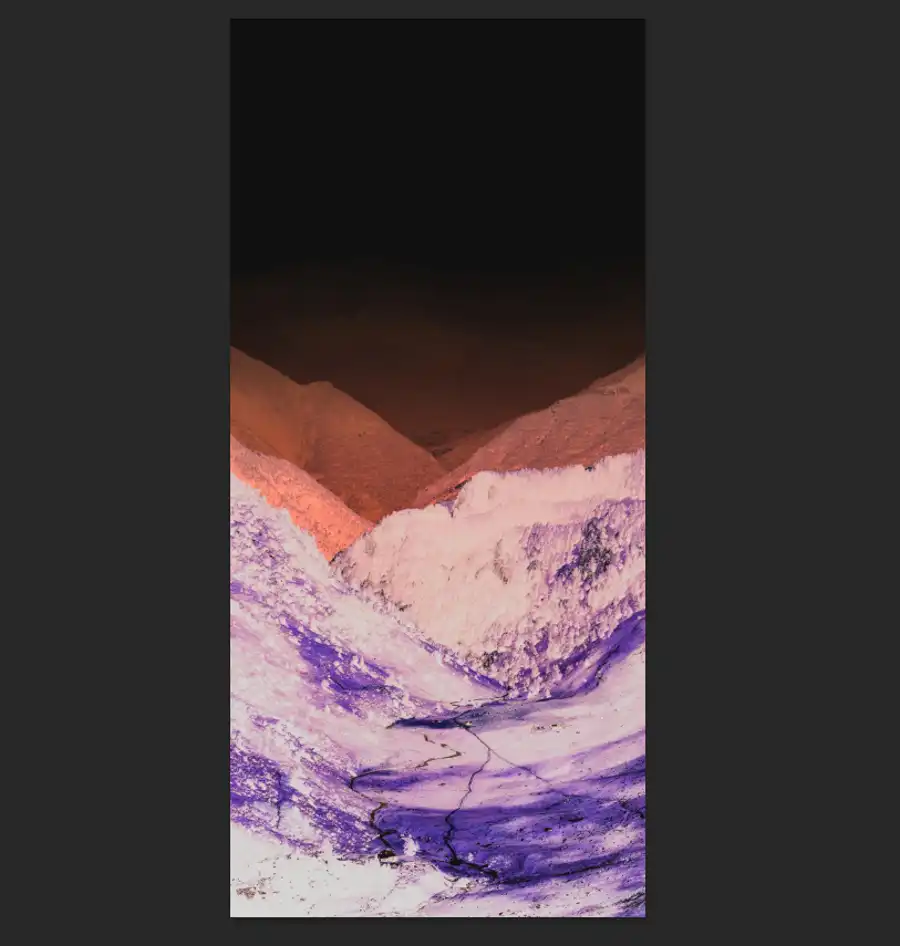
By inverting colors on your photos using Adobe Photoshop, you can give them a new life and use them in your creative projects. For instance, by flipping a vivid blue ocean into a bright orange, or a lush green field into a magenta, you can create an eye-catching abstract photograph, photo collage, or fine art. Moreover, you can use the Invert tool in Photoshop to give a new life to your black-and-white film negatives, and with more control than ever before.
So, how can you invert the colors in your photos using Photoshop? Here's a step-by-step guide:

- Open the image you wish to invert.
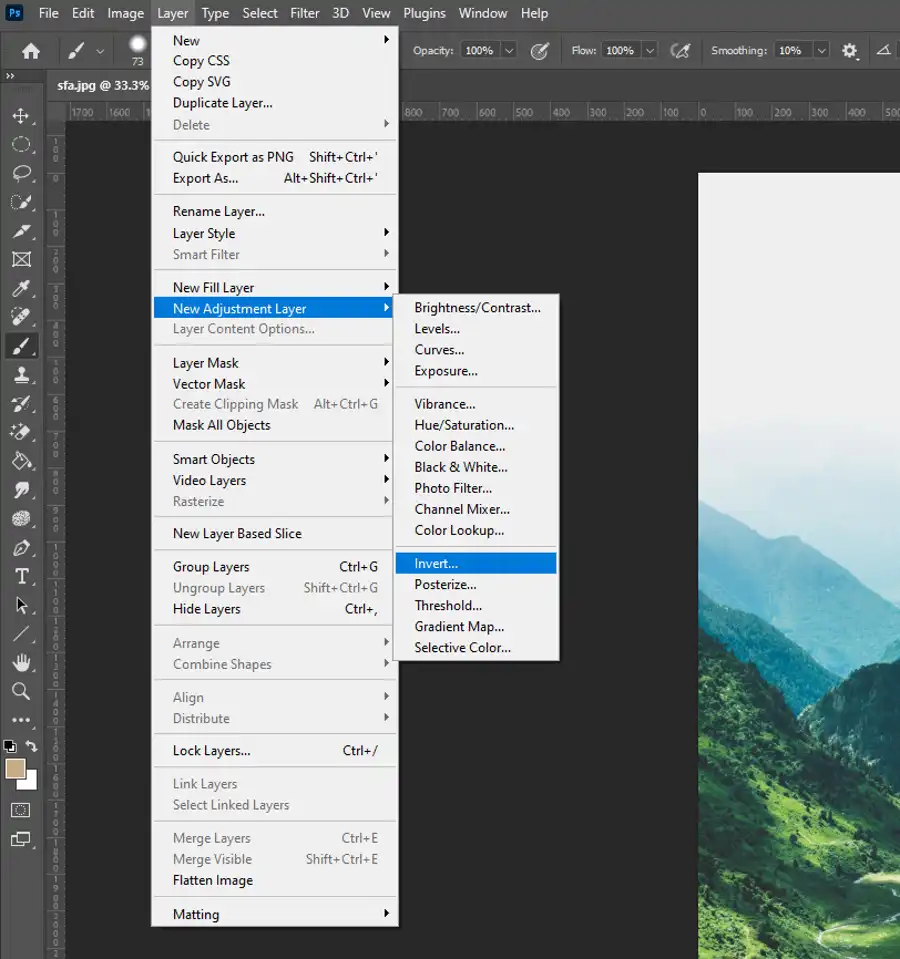
- In the Layers panel, select Invert from the drop-down menu to add a new Invert Layer. Alternatively, you can create it by selecting Layer › New Adjustment Layer › Invert from the top menu bar.
- Create your desired effect by going to Layer › New Adjustment Layer › Levels to add dimension to your images by adjusting the levels sliders. You may also add a Brightness/Contrast layer to create a high-contrast image.
- Fine-tune your levels by moving your Shadows, Midtones, and Highlights sliders.


Once you've inverted your image, you may want to experiment a little further. Here are some additional tips for creating unique photographs with Adobe Photoshop:
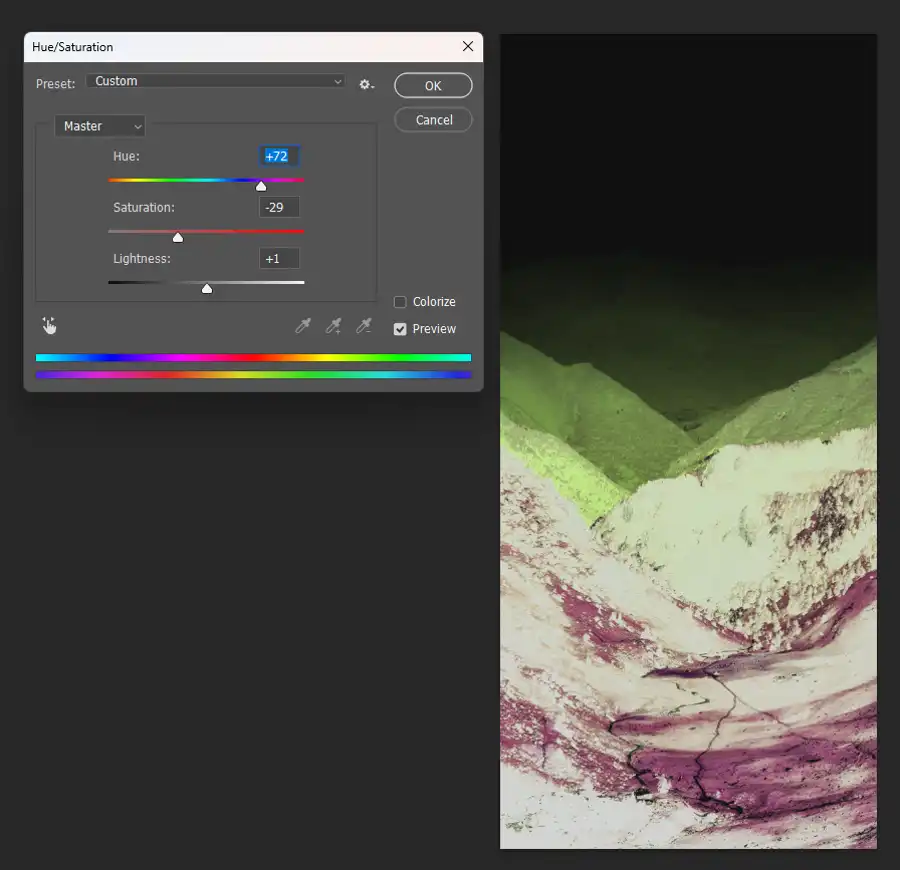
- Use the hue/saturation adjustment layer to intensify or soften your colors as needed.
- Experiment with other color adjustment layers to create contrast or add tinting to your photos.
- Add filters and effects to your photos in Photoshop to add more creativity to your work.

In addition to the color inversion technique, Adobe Photoshop provides numerous other ways to get creative with your photographs. Adobe's Creative Cloud suite of products provides a variety of software that will expand your creation possibilities even more. For instance, you can use Adobe Lightroom Classic to organize and fine-tune your images, Adobe Premiere Pro to make videos, and Adobe Illustrator to create vector graphics and illustrations.
Wrapping up, the color inversion tool in Adobe Photoshop is an excellent way to create striking, imaginative artwork. It's a powerful technique that can improve the creative potential of any photo. Whatever your purpose, be it artistic, commercial or personal, learning the skills to master Adobe's Photoshop's color inversion tool can lead to your work really standing out. By taking advantage of Adobe's Creative Cloud and exploring other Photoshop tools, you can take your photography and photo editing to entirely new and innovative heights.

Questions you might be asking
What is the shortcut for invert colors in Photoshop?
The shortcut for inverting colors in Photoshop is Ctrl + I (Windows) or Command + I (Mac).
How do I reverse the color of an image?
To reverse the color of an image, go to Image > Adjustments > Invert or use the shortcut Ctrl + I (Windows) or Command + I (Mac). This will swap the colors of the image, turning dark colors light and light colors dark.
How do you invert black in Photoshop?
To invert black in Photoshop, go to Image > Adjustments > Invert or use the shortcut Ctrl + I (Windows) or Command + I (Mac). This will reverse all colors in the image, including black.
How do I invert one layer in Photoshop?
To invert one layer in Photoshop, select the layer you want to invert and then go to Layer > New Adjustment Layer > Invert or use the shortcut Ctrl + I (Windows) or Command + I (Mac). This will create an adjustment layer that only affects the selected layer, and will invert its colors.

