
Black and white images can create an impression of a bygone era or draw attention to your subject. Color in photography can be distracting, so if you want to focus on lines, shapes, and textures, try converting an image to black and white. Moreover, making an image black and white can make it more interesting by removing distracting colors and allowing the subject to stand out.

How to make an image B&W?

To create black and white images in Adobe Photoshop, you need control over light and dark levels. A simple way to do it is by using the Black & White adjustment layer. This layer helps you to strip out the colors and use gray tones, giving you control over the light and dark levels of your image.
- You can access the Black & White adjustment layer in two ways within Photoshop: by selecting Window > Adjustments and clicking the Black & White icon or by selecting Layer > New Adjustment Layer > Black & White.
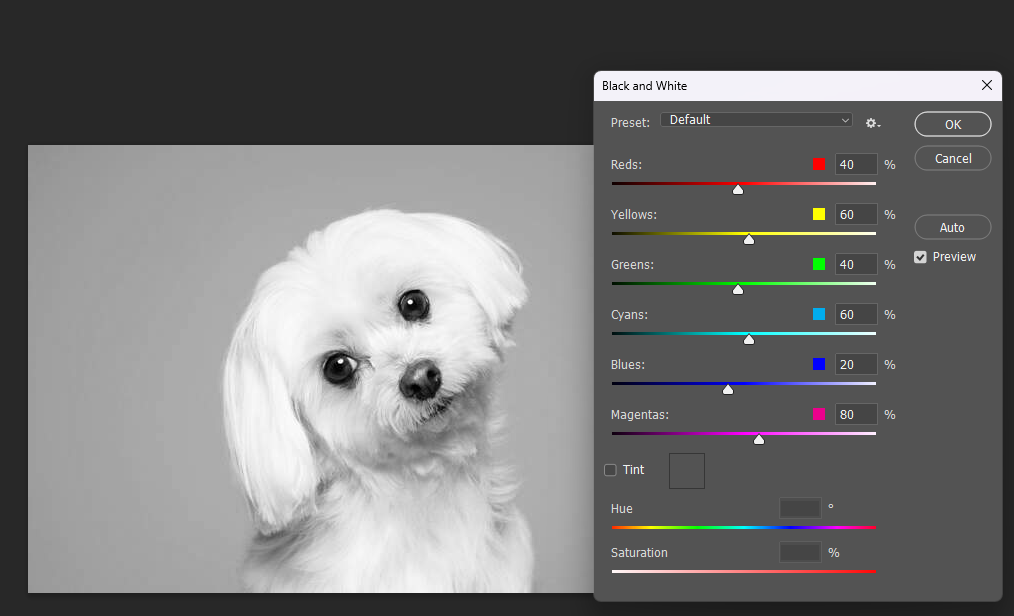
- Once you create the Black & White adjustment layer, the Properties window appears, allowing you to fine-tune the layer settings, including presets, auto settings, tint, color sliders, and on-image adjustment tools.
- The Properties panel helps you to fine-tune your black and white image by using the auto option to set a grayscale mix based on the color values of the original image. This setting provides a starting point for further adjustments. Users can then add color tones, adjusting the gray tones of specific colors in the image using the tint option and color sliders.
The on-image adjustment tool can be used to modify the color slider of a specific color within the image, making this process less time-consuming. This way, you can decide how light or dark any part of your image becomes, or if you want to leave certain parts untouched, like a focal point within an image.
To draw even more attention to a focal point within your black and white image, you can use an additional step to blur the edges around your focal point. Use the elliptical marquee tool to make a selection and apply a Gaussian blur to the edges of your inverted selection. This creates an effect where there is less light around the edges of the image and more light around your focal point.
Questions you might be asking
How do I change an image to black and white in Photoshop?
To change an image to black and white in Photoshop, follow these simple steps:
Open the image you want to edit in Photoshop.
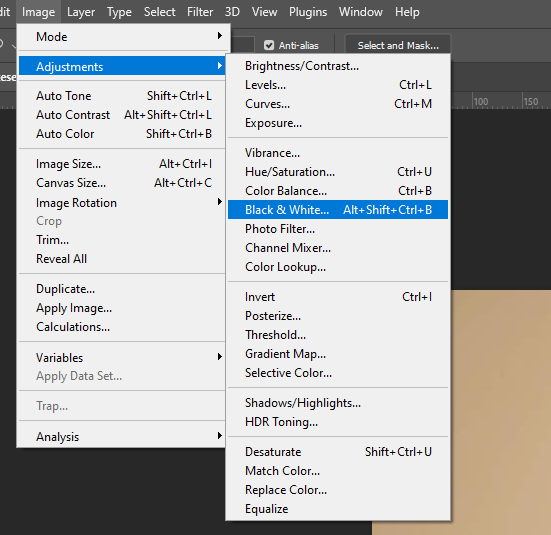
Click on the "Image" menu and select "Adjustments."
From the dropdown menu, select "Black & White."
A dialog box will appear where you can adjust the brightness of the image.
Play around with the sliders and click "OK" when you're satisfied with the result.
How do I turn a picture into black and white?
To turn a picture into black and white, you can use the same steps as described above. Another option is to use the "Grayscale" mode. Here's how:
- Open the picture you want to edit in Photoshop.
- Click on the "Image" menu and select "Mode."
- From the dropdown menu, select "Grayscale."
- A dialog box will appear asking if you want to discard color information. Click "Discard."
- Save your image.
What is the shortcut to make an image black and white in Photoshop?
The shortcut to make an image black and white in Photoshop is "Ctrl + Shift + Alt + B" (Windows) or "Command + Shift + Option + B" (Mac). This will automatically convert the image to black and white without any further adjustments.
How do I grayscale a layer in Photoshop?
To grayscale a layer in Photoshop, follow these steps:
- Select the layer you want to transform into grayscale.
- Click on the "Image" menu and select "Mode."
- Choose "Grayscale." A warning dialog box will appear, click "Discard".
- Once you have converted the layer to Grayscale mode, you can then adjust its brightness, contrast, and other settings to fine-tune the image as needed.
- To save your grayscale layer, simply save your image as a Photoshop document (PSD) or another compatible file format.