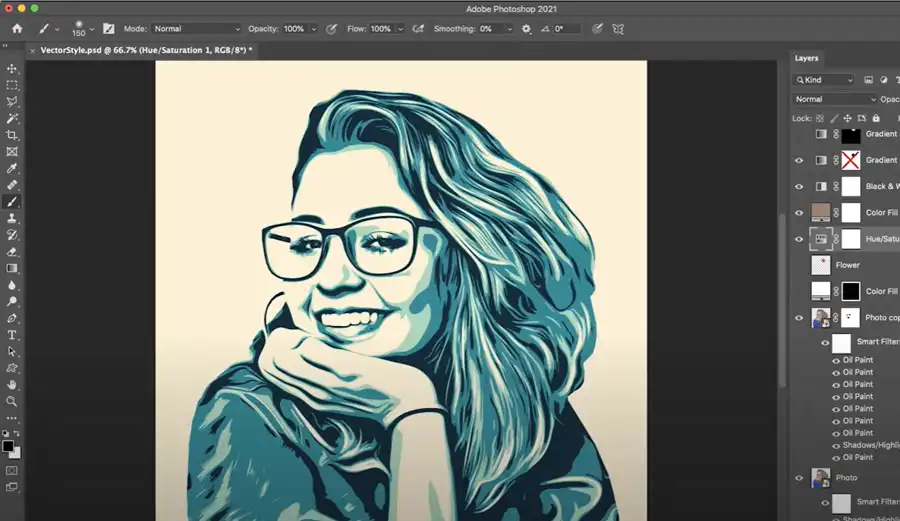
Posterization is an image editing technique that involves reducing the number of colors in an image to create a more artistic, graphic effect. It is an easy way to add a creative twist to your photos. In this article, we will discuss how to add a posterize effect to your images in Photoshop and explore other ways to customize your images using other photo editing tools.

Photoshop is one of the most popular photo editing software that offers a vast collection of tools and features that allow users to modify and enhance their images. With Photoshop, adding a posterize effect to an image is relatively simple. You can use the Posterize adjustment layer or apply a selective posterization effect using the Select Subject tool. Before we dive into the specifics of how to apply posterization, let's first explore what it is.

What is posterization?

Posterization is an image processing technique that involves reducing the number of colors in an image by using fewer colors, in more concentrated areas. This technique results in a more graphic, stylized look that is often used in design and advertising. The name "posterization" is derived from the fact that it was originally used in the printing industry to create posters by reducing the number of colors used in an image, resulting in a simplified, high-contrast image.

How to add a posterize effect to an image in Photoshop
Adding a posterize effect to an entire image in Photoshop is a relatively straightforward process. You can use any version of Photoshop to add this effect.
- Open the image you want to posterize in Photoshop.
- Go to the Layers panel, click on the Adjustment Layer button, and choose Posterize.
- Use the Posterize slider to adjust the number of colors in the image.
- Click OK to apply the effect.
- To refine the effect, add a Levels adjustment layer. Adjust the midtone slider to change the brightness of the image.
- If needed, group the two adjustment layers together and add a layer mask to the group.
- Use the Brush tool to paint on the layer mask to add or subtract areas of the image affected by the posterization effect.
Posterize effect can also be applied as a Smart Filter, allowing you to adjust the degree of posterization non-destructively.

How to add selective posterization effects
To apply a selective posterization effect, you'll need to use Photoshop 2020 or later. The Select Subject tool is a useful option to quickly select the main subject of the image before applying the posterization effect. Here's how you can do it:
- Open the image in Photoshop.
- Choose Select Subject from the Menu Bar or use the Select Subject tool from the Options bar. This tool uses AI to automatically select the main subject in the image.
- Once the main subject is selected, click on the Adjustment Layer button in the Layers panel and choose Posterize.
- Use the Posterize slider to adjust the degree of posterization.
- Refine the effect by adjusting the midtone slider in a Levels adjustment layer.
- Group the two layers and add a layer mask to the group.
- Paint on the layer mask using the Brush tool to add or subtract areas of the image from the posterization effect.

Questions you might be asking
How does Posterize work in Photoshop?
Posterize is a feature in Photoshop that allows you to reduce the number of colors in an image. It works by dividing the colors in the image into a smaller number of color ranges and then mapping each color in the original image to the closest color in the new range. This creates an effect that looks like a poster or a screen print.
Does Photoshop have a Posterize filter?
Yes, Photoshop has a Posterize filter that you can use to apply the Posterize effect to your image. To access this filter, go to Image > Adjustments > Posterize. In the Posterize dialog box that appears, you can adjust the number of color ranges and preview the effect on your image in real-time.
How do you Posterize colors in Photoshop?
To Posterize colors in Photoshop, you can use the Posterize filter or manually adjust the levels of your image. With the filter, you simply select Image > Adjustments > Posterize and adjust the number of color ranges to your liking. To manually adjust the levels, you can select Image > Adjustments > Levels and use the Input Levels sliders to adjust the shadow, midtone, and highlight levels of your image.
How to distort in Photoshop?
To distort an image in Photoshop, you can use the Distort filter or the Liquify tool. To access the Distort filter, go to Filter > Distort and choose from a variety of distortion effects such as Wave, Polar Coordinates, or ZigZag. To use the Liquify tool, go to Filter > Liquify and choose from a variety of distortion brushes to push, pull, or twirl parts of your image to your liking.

