One of the best tools for removing shadows in Photoshop is the content-aware fill tool. With AI-powered technology, this tool can detect the shadow and remove it while maintaining the integrity of the image. Similarly, the patch tool can also be used to remove shadows from well-defined backgrounds by blending the surrounding content.
If your shadows are too harsh, reducing them using layers is a great option. By copying the shadow to a new layer and adjusting the brightness and temperature, you can blend it with the surrounding area to create a softer image.

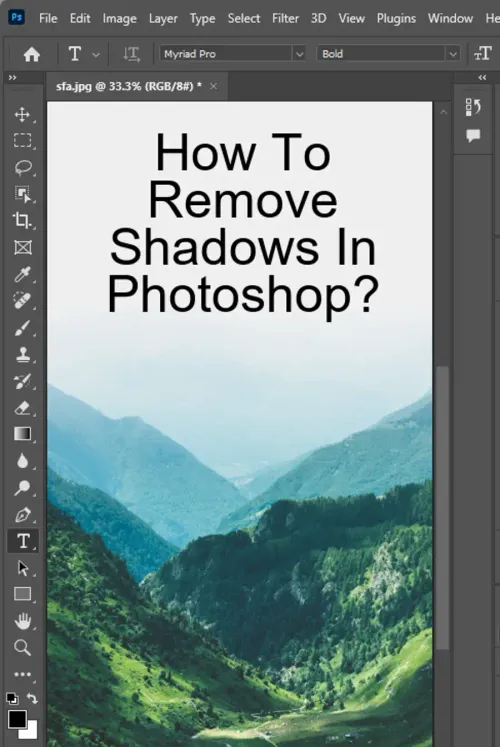
In this tutorial, we'll walk you through how to remove shadows using Photoshop. You'll learn how to remove shadows from a subject's face, clothing, and background. We'll also provide tips on how to remove wall shadows in Photoshop and remove shadows from photos in general.
To get started, make sure you have a basic understanding of Photoshop and its tools. We'll guide you on using the healing brush tool, spot healing brush tool, clone stamp tool, and patch tool to remove shadows. These instructions are designed for users of Adobe Camera Raw, Lightroom, and Photoshop.
Here are the steps we'll take to remove shadows from a photo in Photoshop:
What You'll Learn
- How to Remove the Shadow From a Photo in Photoshop
- How to Remove a Shadow From a Face in Photoshop
- How to Remove Shadows From a Subject's Clothes
- How to Make the Final Adjustments
Step 1: Open Your Image in Photoshop
First things first, open your image in Photoshop. You can do this by going to File > Open.
Step 2: Create a New Layer
Before we begin to remove the shadows, it's important to create a new layer. You can do this by going to Layer > New > Layer.
Step 3: Use the Healing Brush Tool
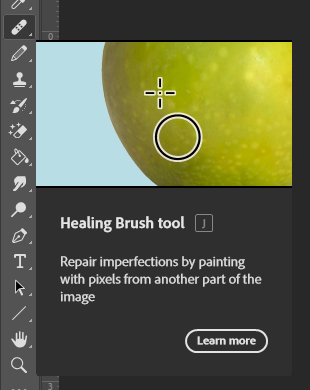
Next, select the Healing Brush tool from the toolbar on the left-hand side of your screen. Use it to remove shadows by painting over the affected areas. It's important to note that this tool works best on small shadows.
Step 4: Use the Spot Healing Brush Tool
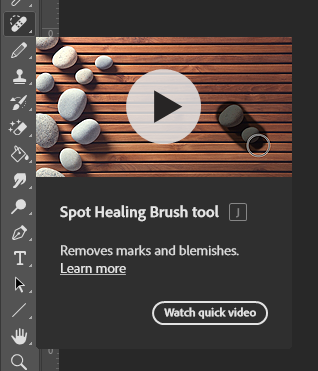
The Spot Healing Brush tool is ideal for removing shadows from small areas like blemishes and pimples on the face. Use it to paint over the shadow and let Photoshop do the rest.
Step 5: Use the Clone Stamp Tool
The Clone Stamp tool is great for removing larger, more defined shadows. Select the tool from the toolbar and use it to select an area that's similar to the area you'd like to remove the shadow from. Then, use the tool to stamp over the shadow.
Step 6: Use the Patch Tool
The Patch tool is excellent for removing shadows from well-defined backgrounds and textures. Use it by selecting the tool and drawing a selection around the affected area, then drag the selection over an area that's similar to what you're trying to remove the shadow from. You can then adjust the selection to blend it in with the surrounding content.
Step 7: Make Final Adjustments
After you've removed the shadows, it's time to make the final adjustments. You can use the Curves and Levels adjustment layers to adjust the brightness and contrast of the photo. You can also use the Color Balance, Hue/Saturation, and Selective Color adjustment layers to adjust the color of the image.
Removing shadows from photos is a great way to balance a photo, draw the viewer's eye to the intended point of focus, and soften the image. With Photoshop, you can do this with ease. Additionally, you can explore other Photoshop tools and beginner elements of photo editing and manipulation, such as black-and-white photography, changing the background, adding blur effects, changing focal length, and duotone effects. By combining these tools and techniques, you'll be able to create stunning and professional-looking photos in no time.
Questions you might be asking
How do I get rid of unwanted shadows?
Unwanted shadows can be removed by adjusting the lighting or position of your subject, or by using photo editing software like Adobe Photoshop to selectively lighten the shadowed areas.
How do I reduce shadows in photos?
You can reduce shadows in photos by adjusting the exposure or brightness settings in your camera or photo editing software. Additionally, using a reflector or diffuser to redirect or soften harsh lighting can also help reduce shadows.
How do I remove shadows from faces in Photoshop Elements?
To remove shadows from faces in Photoshop Elements, you can use the Healing Brush Tool to clone non-shadowed areas over the shadows, or use the dodge tool to selectively lighten the shadowed areas. Alternatively, you can use the Brightness/Contrast or Levels adjustment tools to brighten the entire image and reduce shadows.
How do I whiten shadows in Photoshop?
To whiten shadows in Photoshop, you can use the Curves adjustment tool to selectively brighten the shadowed areas. Simply adjust the curve upward in the shadowed areas to lighten them. You can also use the Brush Tool with a white brush to paint over the shadowed areas and lighten them.