As a 3D artist, I know using Eevee in Blender can be daunting. Relax! Eevee is just one of the render engines you can use in Blender to create stunning visuals in a few simple steps. In this guide, we'll show you how to use Blender's Eevee render engine. Setup, materials, lighting, and faster rendering will be covered. It's easier than you think, so let's get started.

If you don't feel like reading the entire article, here are 3 key takeaways:
2. Eevee and Cycles are both viable 3D rendering options; it depends on the project and budget.
3. Eevee uses physically-based rendering to minimize rasterization limitations and produce more realistic results.
What is Blender Eevee?
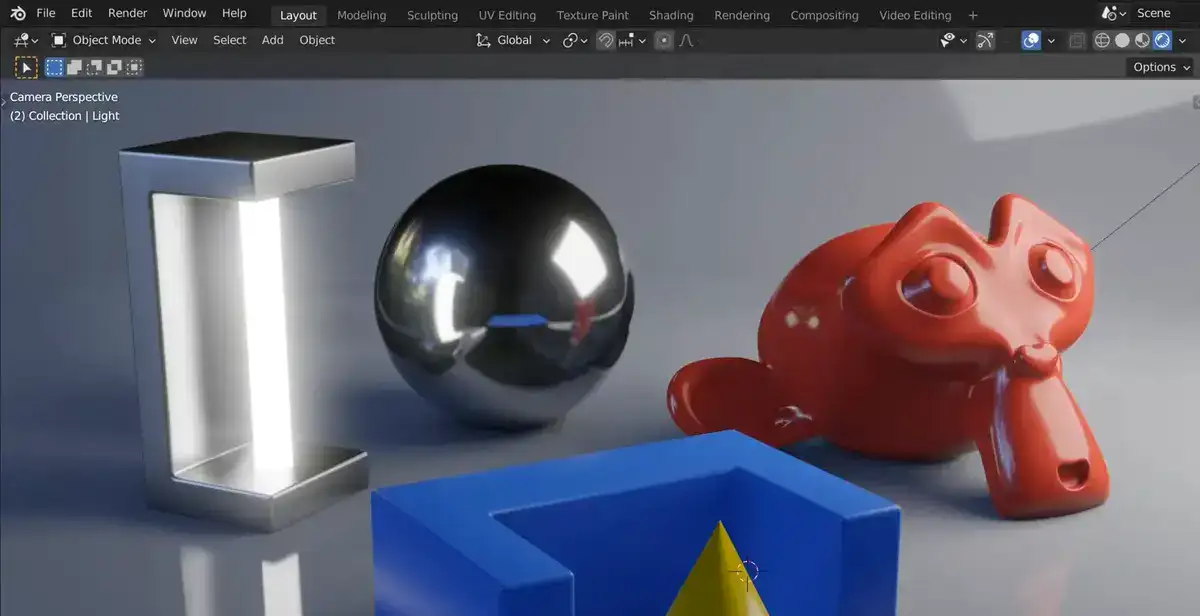
Eevee works within the OpenGL framework in order to allow an incredibly realistic view of your 3D work in a fraction of the time it would usually take. This means that you can get a more accurate representation of your final renders right inside your 3D Viewport without having to wait for traditional raytrace render engines like Cycles. Furthermore, shader nodes are supported by Eevee which allows for complex shading effects with physically based rendering (PBR) principles.
Also read: Create Realistic Shadow in Blender
One limitation of rasterization is that it cannot produce as realistic results as raytracing or cycles but with PBR principles applied to features like lighting, shadows and reflections, this limitation can be minimized considerably. You can also expect better results from using PBR settings such as Global Illumination and Screen Space Reflections which will further enhance realism.
In conclusion, Blender Eevee has revolutionized 3D graphics production not only because of its speed but also because it applies physically based rendering principles to ensure improved visuals and more realistic images overall than what we normally see with traditional rasterization methods. With its support for shader nodes and other advanced techniques, this technology provides artists with everything required to create stunningly realistic visualizations faster than ever before!
How does Eevee work in Blender? The science behind it:
EEVEE uses real-time rasterization instead of Blender Internal's pre-baked pixels and shaders. EEVEE calculates pixel values by combining surface normals, light positions, and material properties like diffuse or specular color. Depending on your settings, this method uses Blinn-Phong or Lambertian shading.
This also means anti-aliasing has been taken care of since these aren't just pixels but real-life calculations. It also uses light maps, light probes, and screen space ambient occlusion for accurate lighting effects.
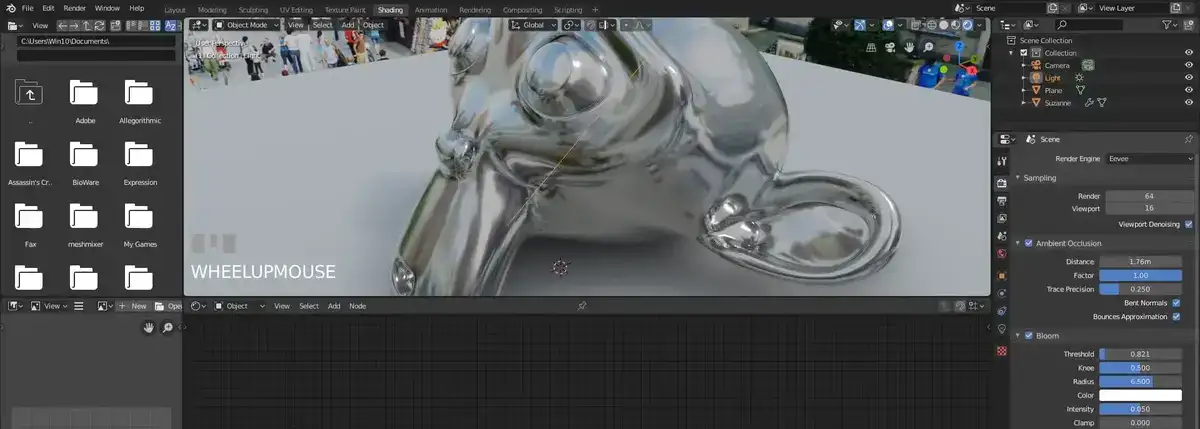
EEVEE can produce blurry shadows using shadow maps and screen space reflections for realistic results without too much work from you. Distance sorted transparency ensures objects close together render correctly when overlapping. If you want more realism, turn off rasterization and enable raytracing via the ‘Render Raytracing' option. This will trace rays from your camera through every scene element (objects & lights) before rendering anything based on the physics of light bouncing around surfaces and taking into account refractions & reflections.
Eevee offers more realistic visuals than its predecessors and renders in fractions of a second thanks to real-time rasterization and ray tracing. It's a must-have for creating photorealistic images quickly and efficiently.
How do you activate Eevee in Blender?
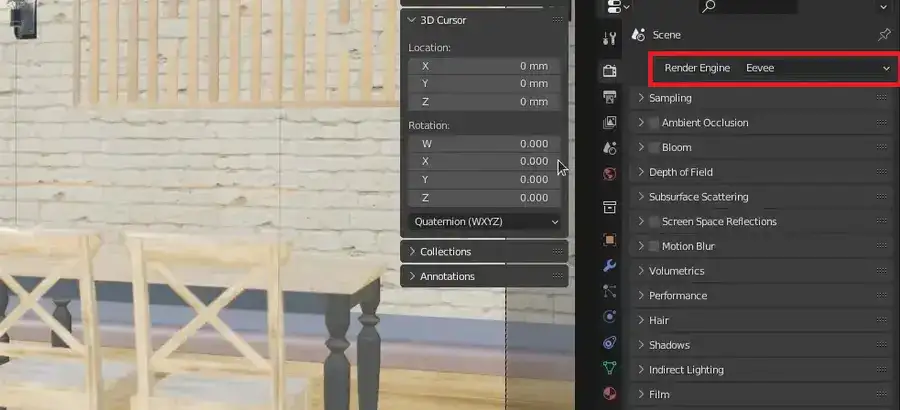
If you are using one of the latest versions of Blender, Eevee is already default render engine. However, you can always change it to Cycles or Workbench if you think they'll be more optimized for your use case or maybe you want to change it back to Eevee after messing up the settings. Here's how:
Step 1: Click the Camera icon in the top-right corner of your 3D viewport to open the shading mode menu. Wireframe and Solid View are available here. Once Eevee is selected, you can access its features via a Render Properties button below the main toolbar.
Step 2: Once clicked, a Render Engine drop-down menu displays Eevee, Cycles, or Workbench (if available). You can choose Eevee from this list. Let's look at some Blender Eevee features:
Step 3: Eevee's real-time rendering tools are now enabled. Dynamic lighting, screen space reflections (SSR), volumetric fog/dust effects, and global illumination make scenes look realistic faster than traditional rendering engines like Cycles or Workbench.
Related: How to Create a Glass Shader in Blender?
You can also control depth-of-field and motion blur to improve your renders. Eevee is a powerful tool for creating amazing visuals quickly and efficiently.
Eevee vs Cycles: Which one should you use?
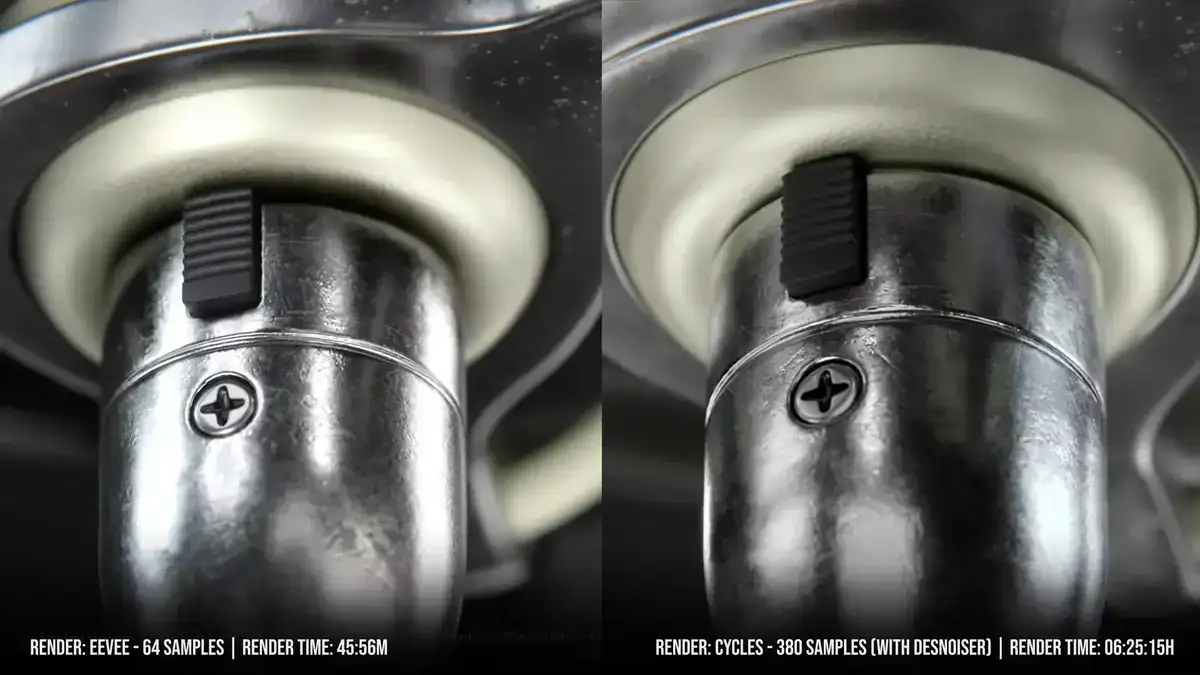
Eevee and Cycles are 3D rendering options. Which has more benefits? Let's compare what each offers to choose.
Eevee is Blender 2.8's real-time render engine. It renders quickly, making it great for creating previews. Eevee's AO feature is a plus too. This feature adds natural shadows and subtle details to projects for more photo realistic look. Eevee requires only a computer that meet Blender's minimum requirements and an updated version of Blender to run.
Cycles is one of the more popular offline renderers, and Blender 2.79's viewport AO is less impressive than Eevee's. Cycles uses global illumination rather than direct lighting based on ray tracing algorithms to produce photo-realistic results, including indirect lighting effects like radiosity and light probes as well as reflections, refractions, and caustics generated from snapshot baked indirect lighting instead of prebaked textures or lightmaps with fewer artifacts like faint dark splotches.
Which to use? This depends on the project and budget. Eevee is faster, but Cycles has more realistic lighting.

