
One of the most powerful tools available in Adobe Photoshop is the Color Replacement Tool. This tool allows the user to replace a color in any image without compromising the quality of the image. Replacing the color of an object is often used to make objects stand out or play with color contrast. In this article, we will discuss different techniques for replacing colors in an image. The Hue/Saturation adjustment, Replace Color dialog, and Color Replacement tool are the techniques that we will cover in this article.

Also read: How to underline in Photoshop?
Selecting the Color Replacement Tool:
To select the Color Replacement Tool:
- Load the image you want to work with in Photoshop.
- Then, select the Background Layer to duplicate it. The reason we do this is to make sure to keep the original image intact.
- With the duplicate layer highlighted, you can select the Color Replacement Tool from the toolbar on the left-hand side of the screen.
Adjusting the Brush Size:
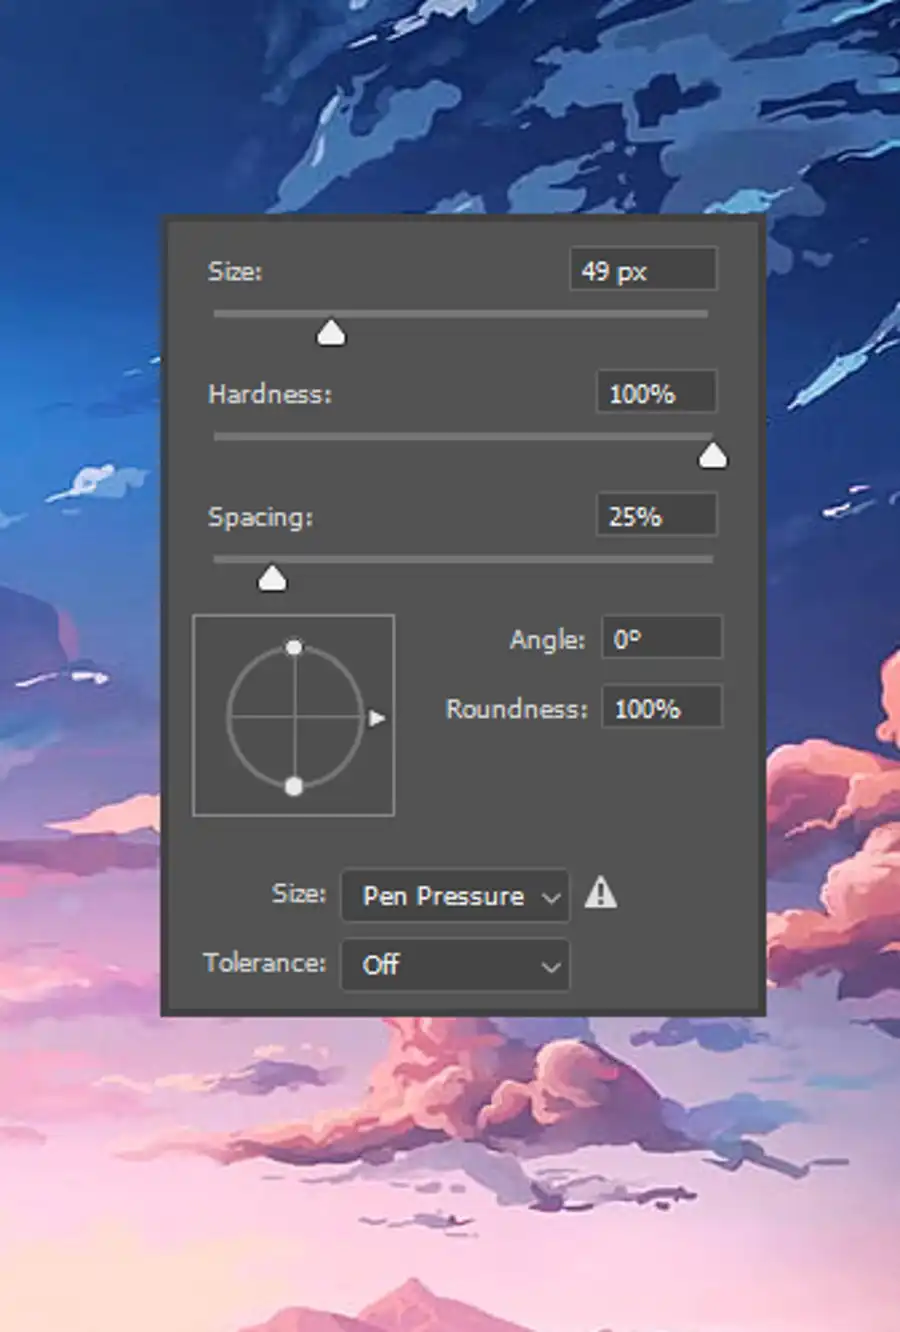
Before we can start using the Color Replacement Tool, we would need to adjust its brush size.
- Select the appropriate brush size from the Brush Presets panel, located on the right-hand side of the screen.
- The size of the brush you select should depend on the size of the object you want to replace the color of. If the object is small, then a smaller brush size should be used, and a larger brush for larger objects.
How the Color Replacement Tool Works:

The Color Replacement Tool works by sampling the color of the area you click on and replacing that color with the color you have chosen in the Color Picker. This tool is incredibly versatile, but it may not always give the desired results. The quality of the result will depend on the colors you are working with, and how closely they are related.
Sampling Colors From The Image:
To give the best possible results, we suggest sampling the colors from the image being worked on. This allows the tool to blend in with the existing colors, into the color range that already exists in the image. To sample the color from the image, choose the Eyedropper tool, and click on the color you want to change. The sampled color will then become the new foreground color in the Color Picker.
The Blend Modes:
The Blend Modes determine how the replaced color will interact with the original image. It is important to note that choosing the correct Blend Mode will significantly affect the outcome of the image. To maintain both contrast and saturation, select the Hue blending mode for the adjustment layer.
The Brightness Problem:
When using the Color Replacement Tool, it can sometimes cause a brightness problem in the areas where the color has been changed. The solution to this is to use the Limits option in the Options Bar. The limits help control how much color to change and reduce the brightness changes.
Sampling Options:
The sampling options in the Color Replacement tool determine how this tool will process the color changes you make. The different sampling options include Continuous, Once, and Background Swatch.
Limits:
The Limits options determine how much color will be replaced in a given area. If you would like to make sure that only a small amount of color is replaced, choose the Discontiguous option.
Anti-Alias:
Anti-aliasing is a technique that Photoshop uses to improve the quality of images. This technique smooths out the edges of images, making them appear more organic. The Anti-Alias checkbox fixes the jagged edges that can occur when using this tool.
Questions you might be asking
How do you use replace color in Photoshop?
To use the replace color tool in Photoshop, go to Image > Adjustments > Replace Color. Click on the color you want to replace and adjust the settings until you get the desired result. You can also use the eyedropper tool to make a more accurate selection.
How does colour replacement tool work?
The color replacement tool works by allowing you to select a color range and replace it with another color. You can adjust the hue, saturation, and lightness of the new color to get the desired effect. It's a quick and easy way to change the color of an object or background in an image.
How do I use the color sample tool in Photoshop?
The color sample tool allows you to select a color from anywhere on your image. To use it, select the Eyedropper tool from the toolbar, then click and hold down on the image. A small preview window will appear, showing you the color you've selected. You can then use this color in other parts of your image by selecting it from your Swatches panel.
Why is my colour replacement tool not working?
There could be several reasons why your color replacement tool is not working. First, make sure you've selected the correct color range that you want to replace. Also, check to make sure that your brush size is appropriate for the area you're trying to replace. Finally, make sure that your layer is not locked or set to an opacity that prevents changes.