White balance refers to the color temperature of a photograph, which can vary depending on the source of light used. Adjusting the white balance helps to achieve accurate colors, mood, and realism in the picture. A warm and sunny day may make the photo appear yellowish, while a cloudy day may produce a cool blue color. Understanding white balance and how it can affect an image’s color cast, flatness, and saturation is essential for producing high-quality images.

Adjusting White Balance in Camera
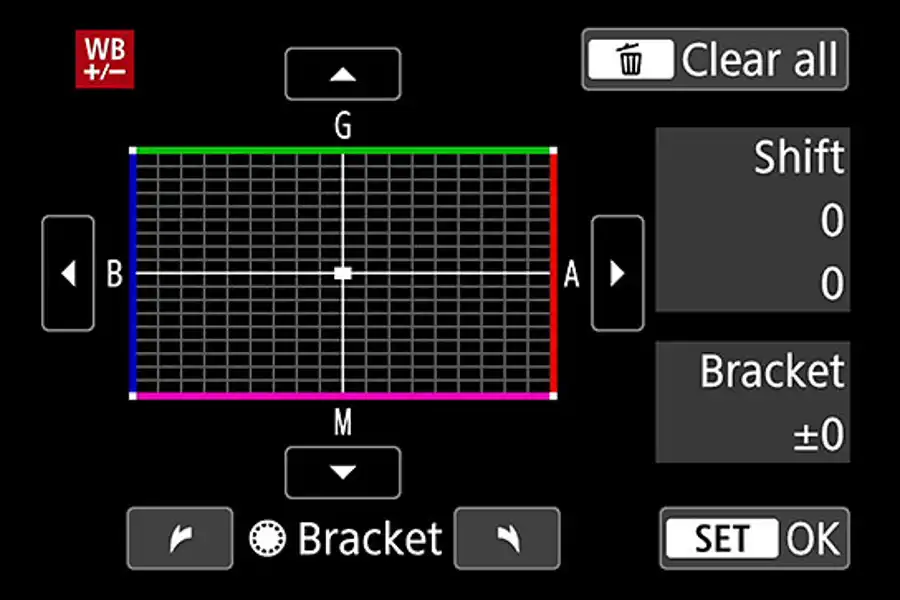
Starting with adjusting the white balance in the camera settings is ideal to achieve the desired effects in a picture. Shooting in different lighting can result in a mismatch of color temperatures, making it harder to edit in post-production. Using a gray card or a color checker helps to adjust white balance to specific lighting situations and photography styles. Shooting in RAW format provides an opportunity to adjust white balance in post-production easily.
Adjusting White Balance in Editing
Post-production editing in Adobe Photoshop or Lightroom is a great way to achieve a more accurate representation of colors.
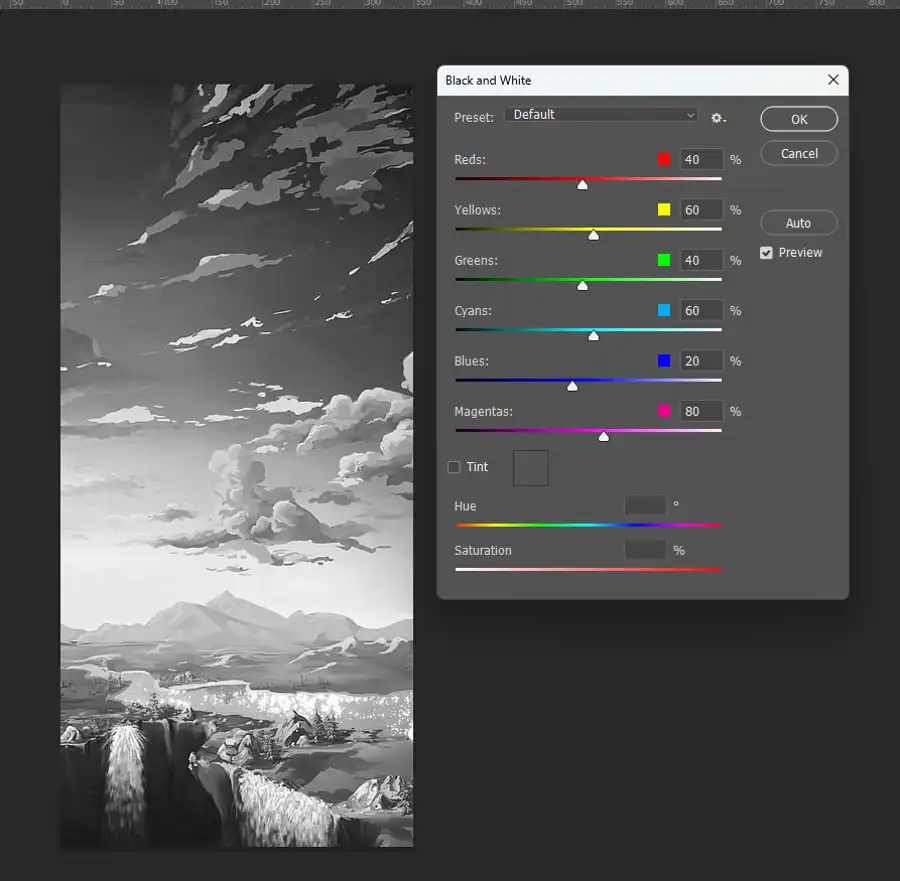
In Adobe Photoshop, using the Curves tool is an advanced way of adjusting white balance. The tool allows you to make precise adjustments to the color tones in an image. You can either adjust the overall image white balance or adjust it selectively for individual colors. Curves is an adjustment layer, which allows for selective adjustments using layer masks. While in Adobe Lightroom, the Temperature Slider is an easy way to adjust the warmth or coolness of a picture.
Advanced Ways to Fix White Balance in Photoshop
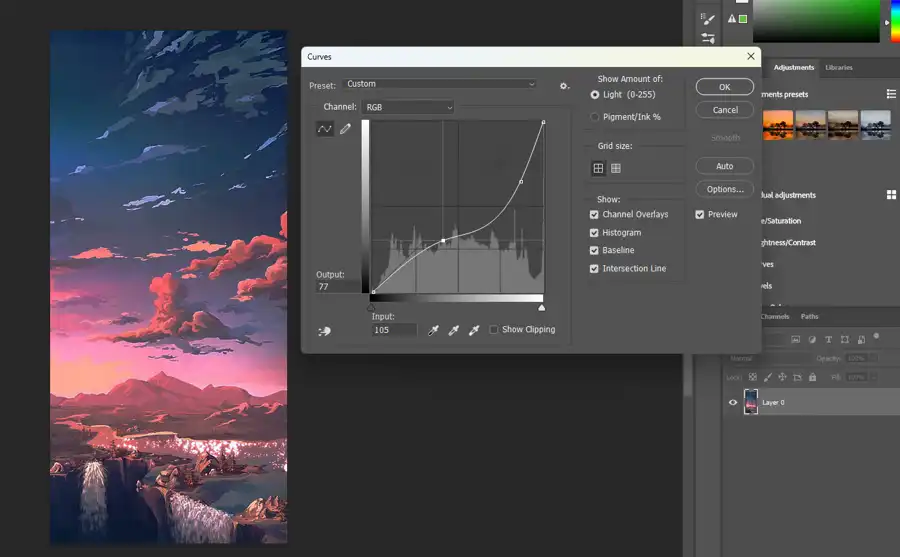
Photoshop offers many advanced ways to fix white balance using techniques such as Curves adjustment layer, Photo Adjustment layer, and X-Rite ColorChecker. Curves adjustment layer allows for selecting portions of the photo, making localized edits and adjustments. Applying layer masks with corrections that reduce or increase the temperature, tint, or saturation of the photo can create high-quality images. With a Photo Adjustment layer, you can set an overall white balance for the entire photo, making it ideal for advanced photo editing. Using X-Rite ColorChecker to take a color profile photo then using it as a reference to remove any color casts in the image.
Experiment Shooting the Same Subject with Different Settings
Understanding white balance is crucial to achieve desired effects in a photograph. One way to master white balance is by experimenting while shooting the same subject with different settings. Use a gray card or a color checker to achieve accurate colors and to match the white balance of the different photographs. Use the Curves adjustment tool in Adobe Photoshop to refine and adjust the images for a more creative interpretation of your subject.
Conclusion
In conclusion, white balance plays an essential part in digital photography. Using correct settings in-camera helps to achieve a more accurate representation of colors. Should it be necessary to edit, Adobe Photoshop, Curves adjustment layer, and Adobe Lightroom are effective in making advanced white balance adjustments. Experimenting by shooting the same subject under different lighting conditions is a great way to understand the impact of white balance on an image. With the knowledge acquired, the white balance can be used to create artistic interpretations of subjects, and high-quality photographs can be produced.
Questions you might be asking
How do I balance an image in Photoshop?
Balancing an image in Photoshop can be achieved by adjusting the levels of brightness, contrast, and color tones. To balance an image, open it in Photoshop, go to the "Image" menu, and select "Adjustments". From there, choose the "Levels" option. A pop-up window will appear, and you can adjust the sliders for shadows, midtones, and highlights to achieve a balanced image.
How do you do perfect white balance?
Achieving perfect white balance is crucial for accurate colors in photography. There are several methods for doing this, but one popular method is the use of a gray card. Before taking a photo, hold a gray card in the same lighting conditions as the subject. Once in Photoshop, use the "White Balance" tool to select a portion of the gray card area. This will ensure accurate white balance in the image.
How do you auto color balance in Photoshop?
To auto color balance an image in Photoshop, go to the "Image" menu and select "Auto Color". Photoshop will automatically adjust the colors in the image based on its analysis of the tonal range. Alternatively, you can go to the "Image" menu and select "Adjustments", then choose "Color Balance". From there, you can adjust the sliders to balance the colors in the image manually.